

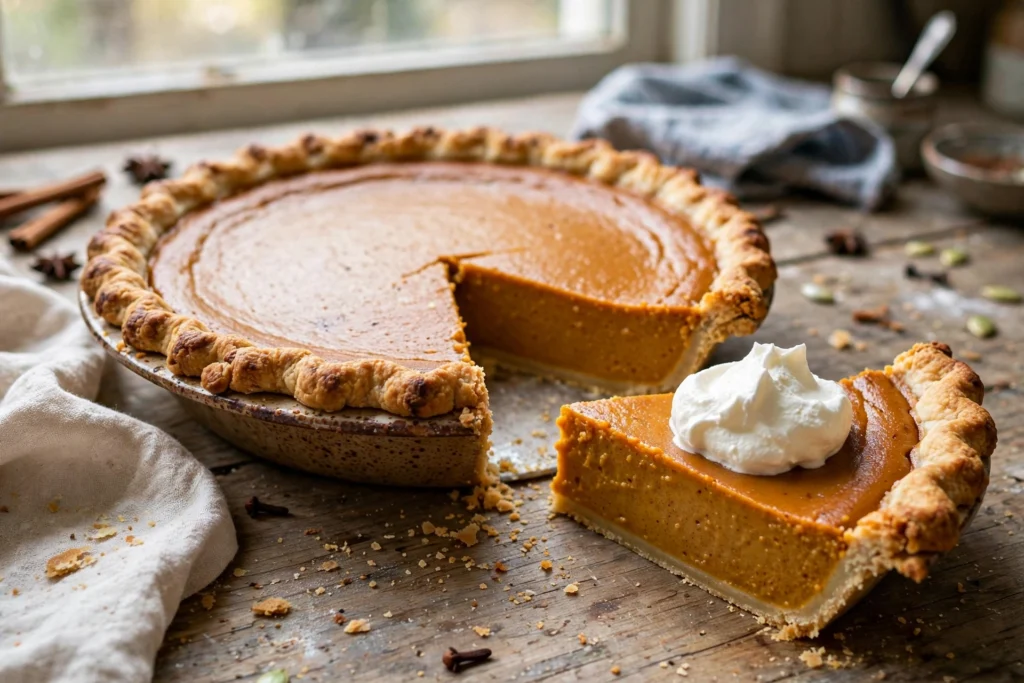

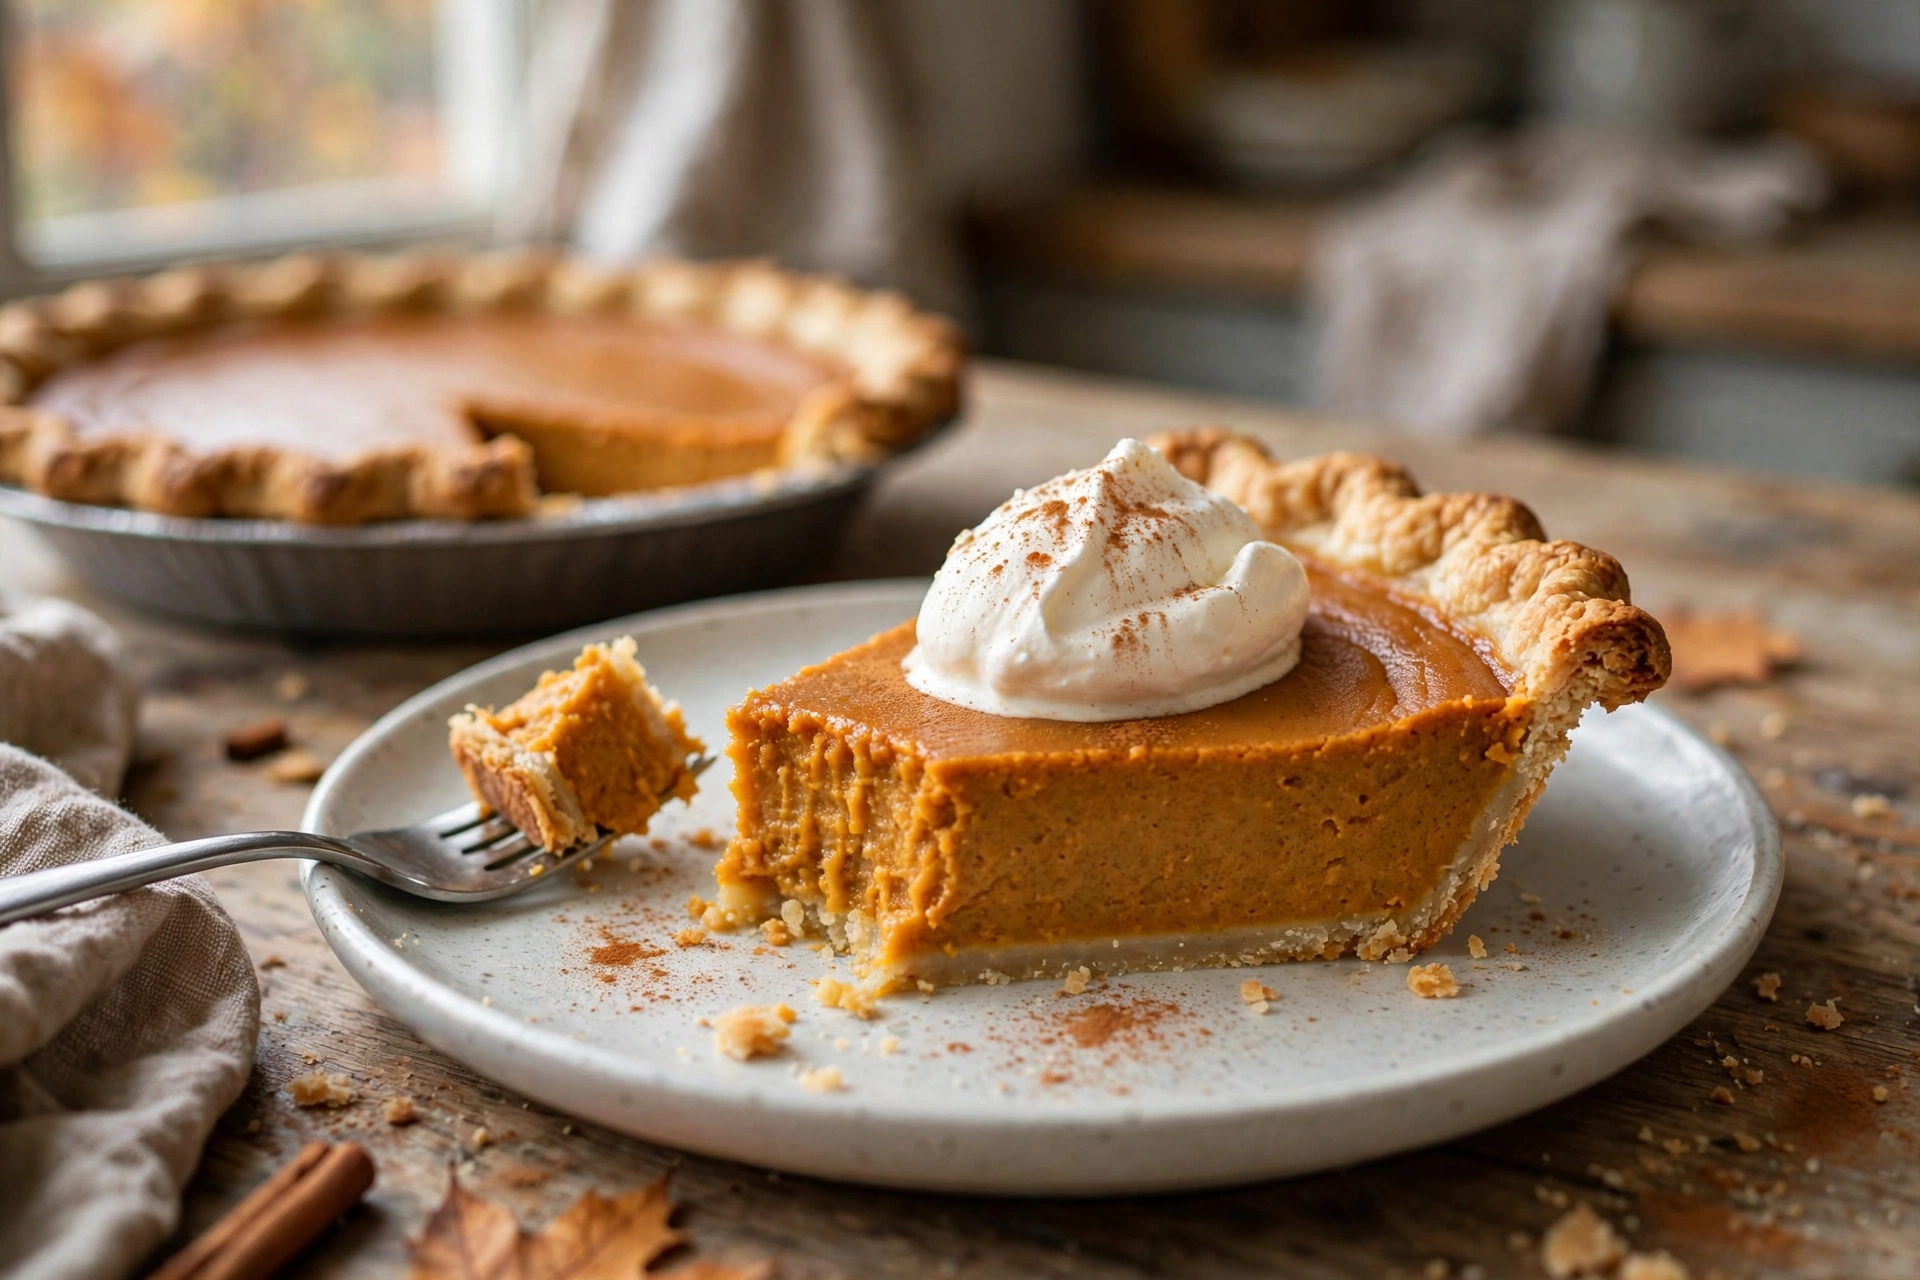
Every Thanksgiving table has one dessert that everything else orbits around, and more often than not, it’s the pumpkin pie. Not the overly sweet bakery kind with a soggy crust — the real thing: a flaky, golden shell holding a custard so silky it barely holds its slice, spiced with cinnamon, ginger, nutmeg, and clove, served with a cloud of whipped cream that melts into the warm filling.
The problem? Pumpkin pie has a reputation for being fussy. Cracked tops, weepy filling, soggy bottoms, bland flavor — there are plenty of ways it can go sideways, and a quick search returns a hundred conflicting “secrets.” This recipe cuts through all of that with a method that simply works: a hot-start oven that sets the crust fast, a gentle finish that cooks the custard through without curdling, and the jiggle test that tells you exactly when to pull it. No blind baking required (though there’s an option if you want it), no water bath, no thermometer gymnastics.
The filling is a true classic custard — real pumpkin puree, eggs, evaporated milk, and a balanced spice blend where cinnamon leads and the warm spices support. It tastes like fall the way fall is supposed to taste: cozy but not cloying, spiced but not sharp, rich but somehow light enough for a second slice. And because the custard needs to cool and set for a couple of hours, this is a dessert that rewards planning — which also makes it one of the best make-ahead Thanksgiving desserts there is. Bake it the day before, and dessert takes care of itself while the turkey drama unfolds.
Table of Contents
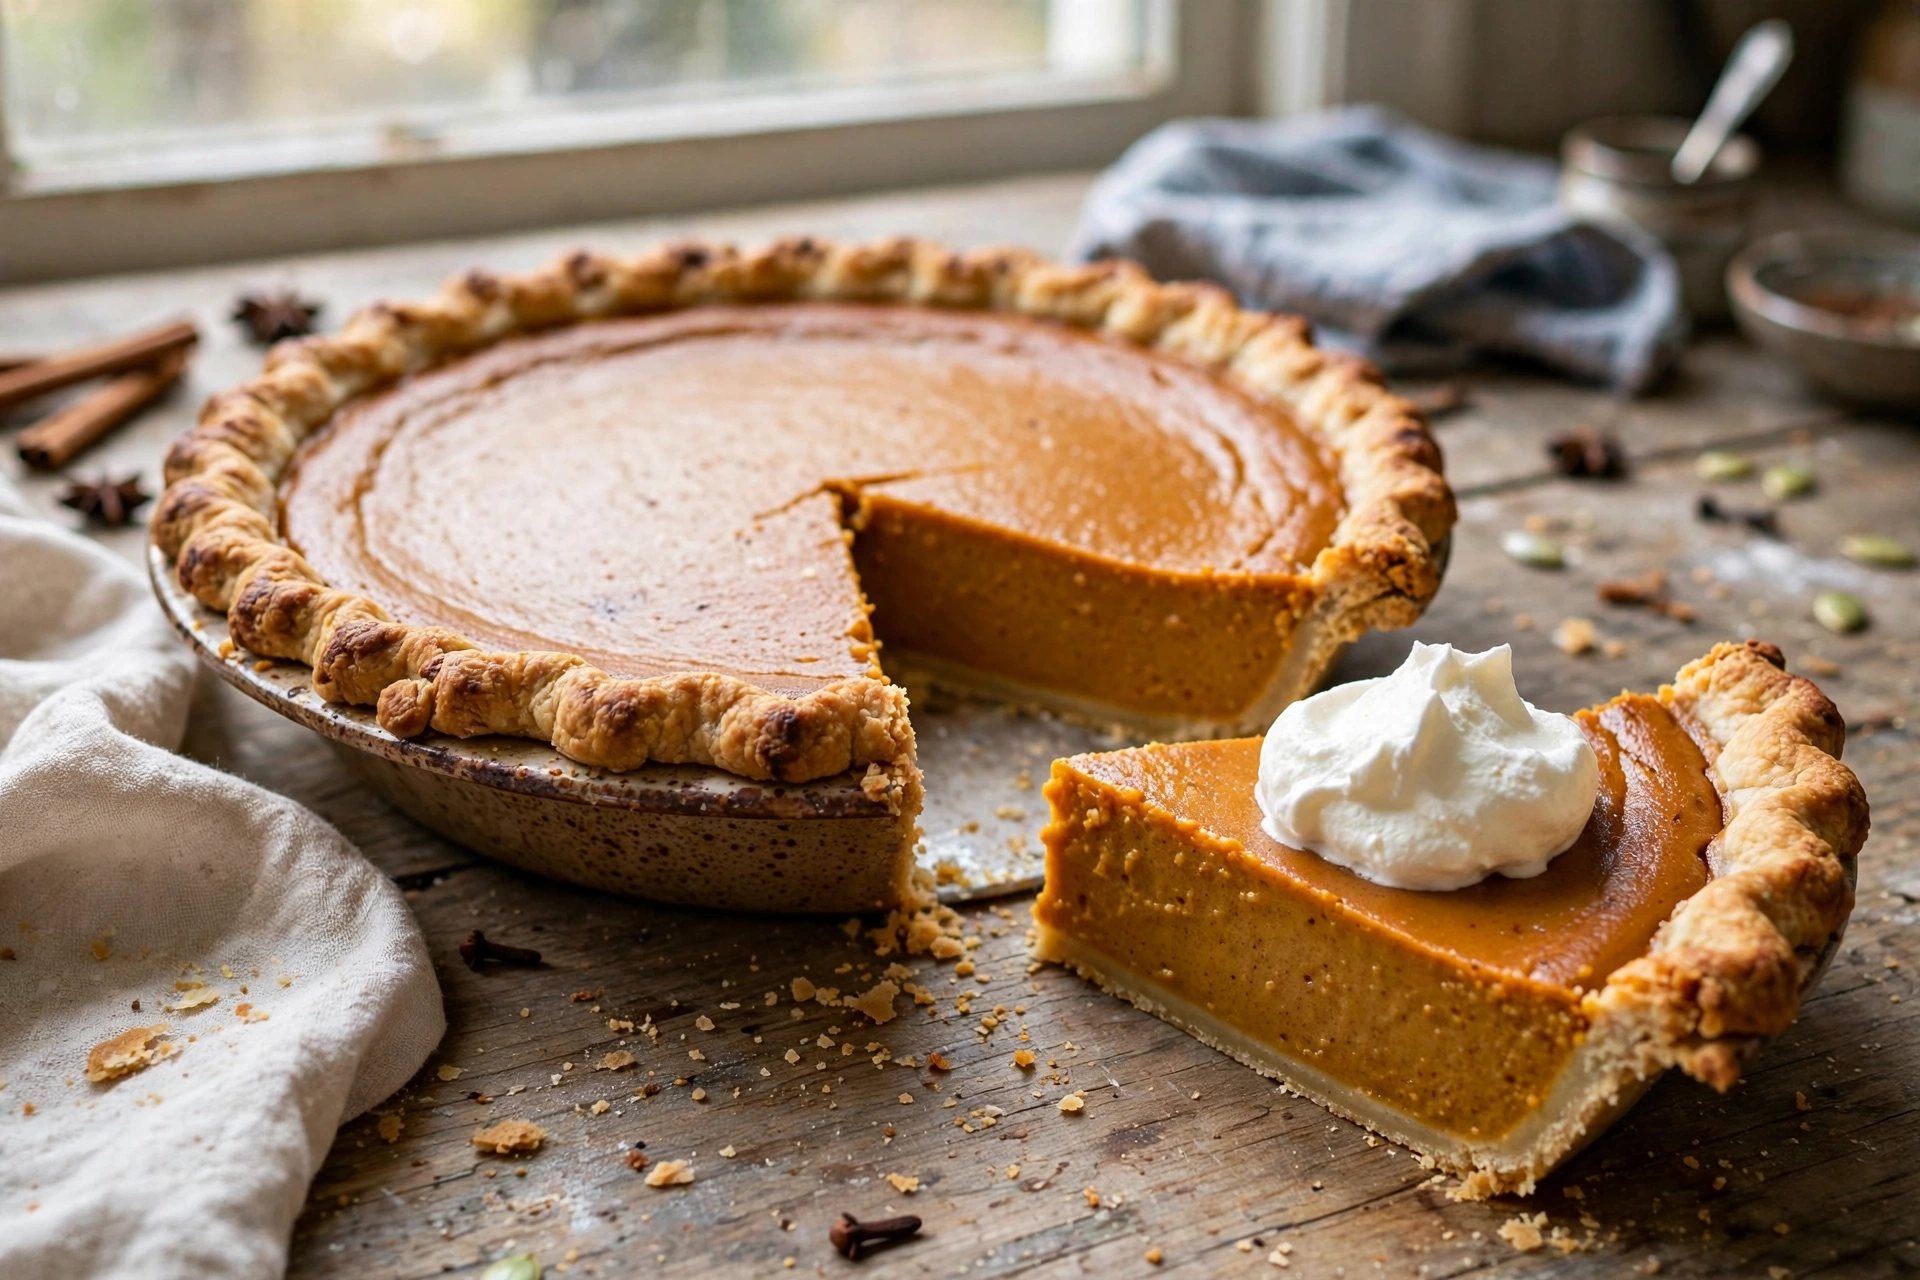
Why You’ll Love This Classic Pumpkin Pie
- Silky, crack-free custard: The two-temperature bake and the jiggle test mean a smooth, glossy top — no cracks, no weeping, no curdled edges.
- Real pumpkin flavor: 100% pumpkin puree (not the pre-spiced pie filling), so the pumpkin taste actually comes through.
- Flaky crust, no soggy bottom: Starting the bake hot sets the crust before the wet filling can soak through.
- Make-ahead champion: It needs hours to cool and set anyway — bake it the day before Thanksgiving and it’s better for it.
- Simple pantry ingredients: No specialty items. Flour, butter, a can of pumpkin, eggs, evaporated milk, sugar, spices — that’s the whole list.
- Customizable: The variations below cover maple, gingersnap crust, mini pies, and a no-roll crust shortcut.
Ingredients You’ll Need
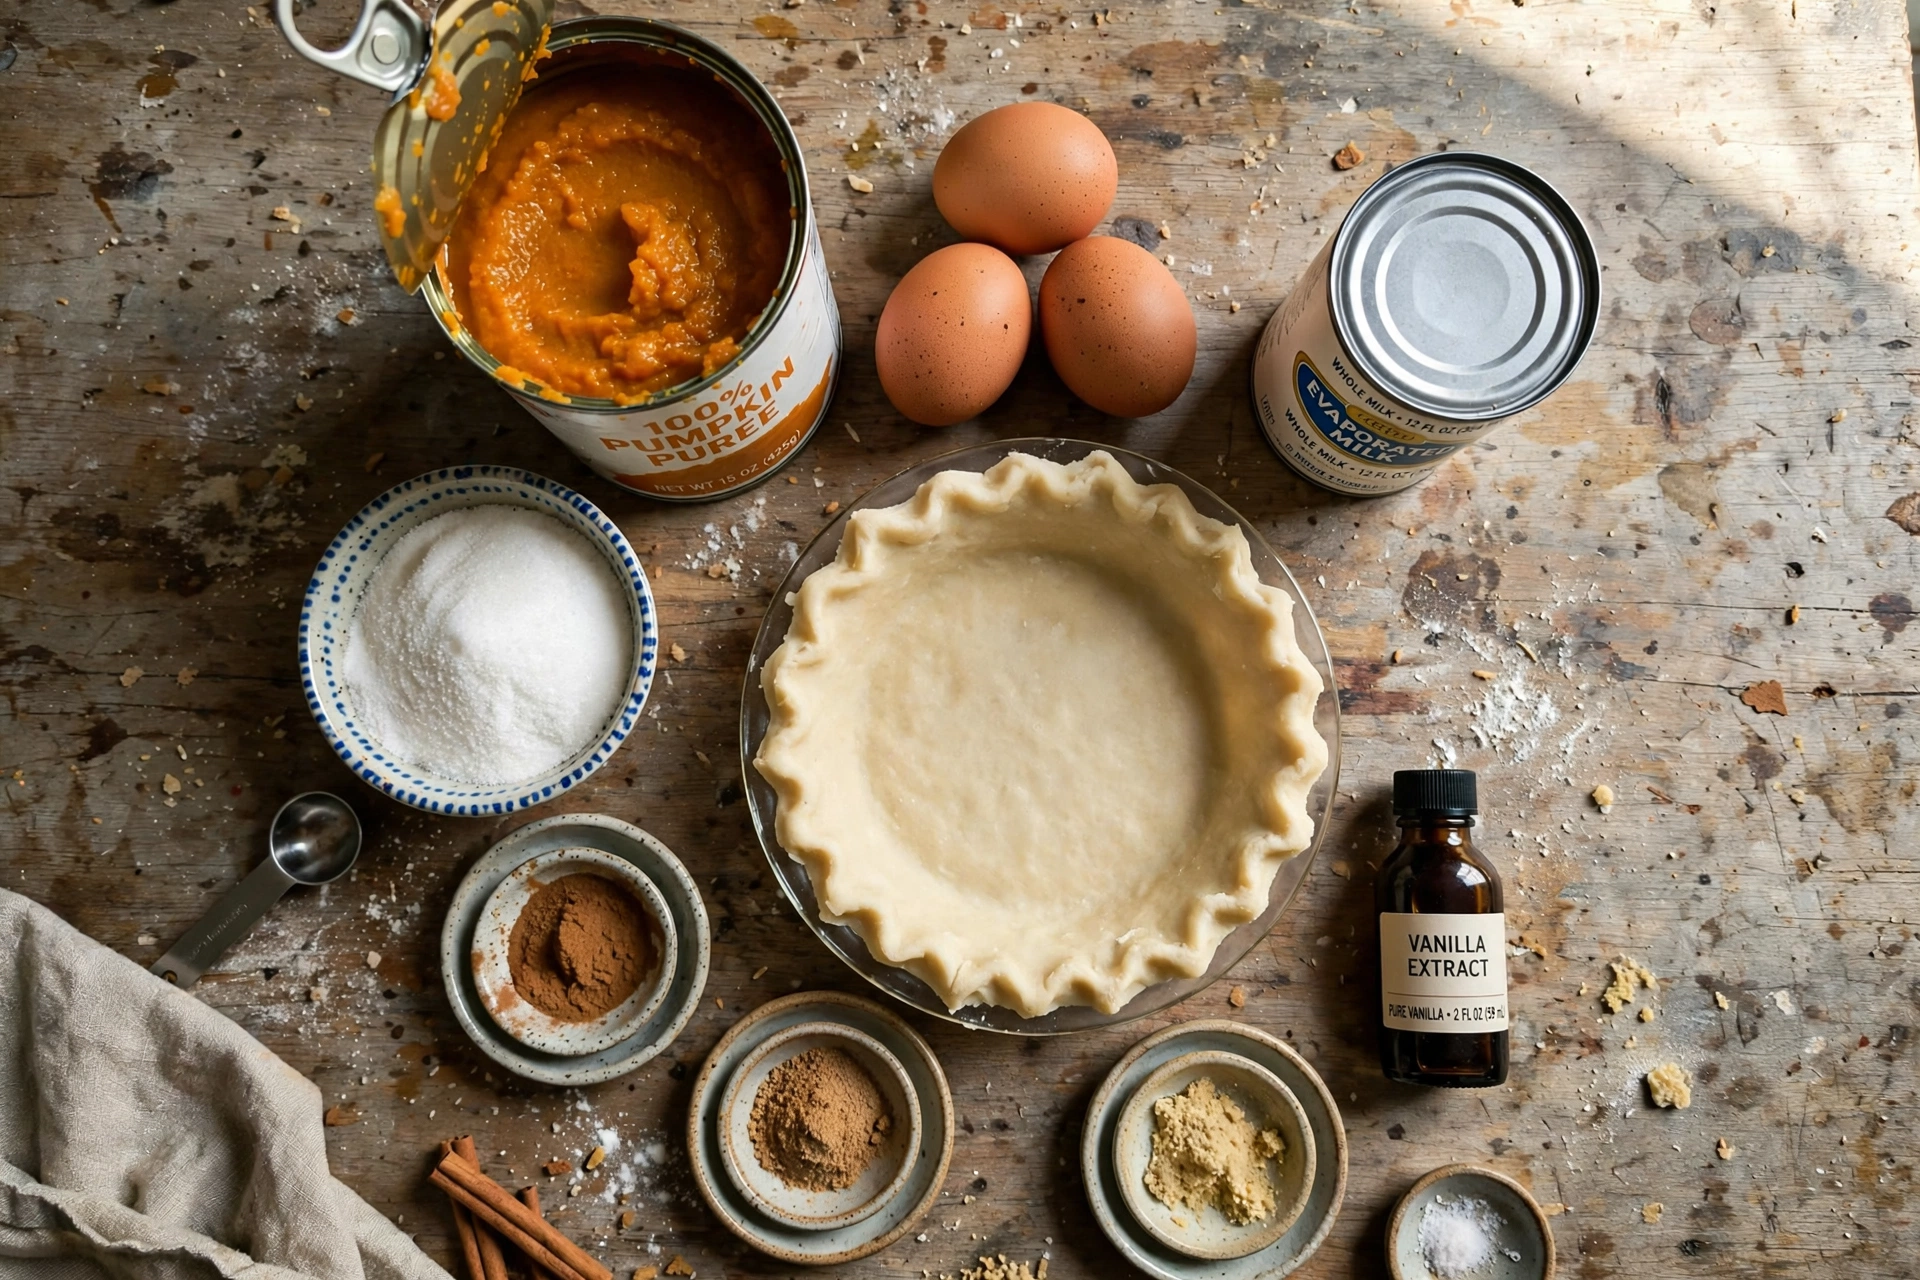
A pumpkin pie is only as good as its custard, and a great custard is only as good as its ingredients. Every item here earns its place — here’s what each one does and why it matters.
Pumpkin Puree (1 can, 15 oz)
Use 100% pure pumpkin puree — NOT pumpkin pie filling. They sit side by side on the shelf and look nearly identical, but pie filling is already sweetened and spiced, and using it here would throw off both the sugar and spice balance. Check the label: the ingredients should say “pumpkin” and nothing else. Canned puree is genuinely excellent for this — it’s made from dense, flavorful squash varieties bred for pie, it’s consistent batch to batch, and it has the smooth texture a custard needs. Fresh-roasted pumpkin is lovely in theory, but it’s wetter and more variable; if you go that route, you’ll need to drain it thoroughly.
Eggs (2 large)
Eggs are the structure of the custard. Their proteins set as the pie bakes, turning the loose liquid filling into that sliceable, silky custard. Use large eggs at room temperature — cold eggs can make the filling seize slightly and take longer to set. Two eggs is the classic ratio for a 9-inch pie: enough to set the custard firmly without turning it rubbery or eggy-tasting.
Evaporated Milk (1 can, 12 oz)
Evaporated milk is the traditional liquid for pumpkin pie, and there’s a reason it has survived a century of recipe trends: about 60% of its water has been removed, so it adds creamy richness without watering down the custard. That matters because a watery filling takes longer to set, which means more time in the oven, which means a higher risk of cracks. Whole evaporated milk gives the silkiest result. (Sweetened condensed milk is a different ingredient — there’s a variation below if you prefer it, but it changes the sugar math entirely.)
Granulated Sugar (3/4 cup)
Sugar sweetens, but it also does quiet structural work: it tenderizes the custard by interfering with egg protein bonding, which is part of what keeps the texture silky instead of firm and rubbery. Three-quarters of a cup hits the classic balance — clearly sweet, but the pumpkin and spice still come through. Brown sugar works as a partial swap for a deeper, molasses note (see variations).
Spices: Cinnamon, Ginger, Nutmeg, Cloves (1 tsp / 1/2 tsp / 1/4 tsp / 1/8 tsp)
This is the classic “pumpkin pie spice” quartet, measured individually so you can taste and adjust rather than being locked into a pre-mixed jar. Cinnamon (1 teaspoon) leads — it’s the warm, sweet backbone. Ground ginger (1/2 teaspoon) adds a gentle heat and brightness that keeps the pie from tasting flat. Nutmeg (1/4 teaspoon) brings depth and that unmistakable holiday aroma. Ground cloves (1/8 teaspoon) are potent — a little adds complexity, a little more takes over the whole pie, so measure carefully. Use fresh-ish ground spices; spices lose punch after a year, and this pie is mostly spice aroma.
Salt (1/2 teaspoon)
Salt in a dessert always raises eyebrows until people taste the difference. Half a teaspoon doesn’t make the pie salty — it amplifies the pumpkin and spice flavors and rounds out the sweetness. Skip it and the pie tastes noticeably flatter. Diamond Crystal and Morton measure differently, so if you’re using fine table salt, level the spoon carefully.
All-Purpose Flour (1 1/4 cups, for the crust)
Standard all-purpose flour makes a tender, flaky crust when you keep it cold and don’t overwork it. The 1¼-cup quantity is sized for a single 9-inch crust with a little overhang for crimping. Spoon the flour into the measuring cup and level it off — scooping packs it down and you’ll end up with a tough crust.
Cold Unsalted Butter (1/2 cup / 1 stick, for the crust)
Butter is the flavor and the flakiness. Those visible little butter pieces you cut into the flour melt in the oven and release steam, which pushes the dough layers apart into flakes. It must be genuinely cold — straight from the fridge, cut into cubes — and the water you add must be ice water. Warm butter blends into the flour instead of staying in pieces, and that’s the difference between flaky and mealy. Unsalted lets you control the salt (there’s 1/4 teaspoon in the crust dough).
Ice Water (3–4 tablespoons, for the crust)
Just enough to bring the dough together — no more. Add it a tablespoon at a time. The dough should hold together when squeezed but not feel wet or sticky. Too much water develops gluten and makes a tough crust; too little and it cracks when you roll it.
Recommended Equipment
- 9-inch pie dish (glass is ideal — you can see the bottom crust browning)
- Large mixing bowl and a whisk
- Pastry cutter or two forks (for cutting butter into flour)
- Rolling pin and a lightly floured surface
- Rimmed baking sheet (the pie bakes on this — catches drips and makes it easy to move)
- Pie shield or strips of aluminum foil (to protect the crust edges)
- Wire cooling rack
How to Make Classic Pumpkin Pie
1. Make the crust dough
Whisk together 1¼ cups all-purpose flour and ¼ teaspoon salt in a large bowl. Add ½ cup (1 stick) cold unsalted butter, cut into small cubes. Cut the butter into the flour with a pastry cutter or two forks until you have pea-sized pieces with some smaller bits mixed in — those varied sizes are what create flaky layers. Drizzle in 3 tablespoons of ice water, tossing with a fork, then add a fourth tablespoon only if the dough won’t hold together when squeezed. Gather it into a disk, wrap in plastic, and refrigerate for at least 30 minutes. (Cold dough rolls out cleanly and shrinks less in the oven.)
2. Roll out and fit the crust
On a lightly floured surface, roll the chilled dough into a 12-inch circle, turning it a quarter-turn every few rolls to keep it even. Drape it over the rolling pin and transfer to a 9-inch pie dish. Ease it into the corners without stretching — stretched dough snaps back and shrinks in the oven. Trim the overhang to about 1 inch, fold it under itself, and crimp the edge with your fingers or a fork. Refrigerate the fitted crust for 15 minutes while the oven heats; a cold crust going into a hot oven is the foundation of flakiness.
3. Heat the oven — two temperatures
Position a rack in the lower third of the oven and place a rimmed baking sheet on it. Preheat to 425°F (220°C). The pie starts hot, which sets the bottom crust fast before the wet filling can soak in — this is the anti-soggy-bottom trick, and it works without any blind baking.
4. Whisk the filling
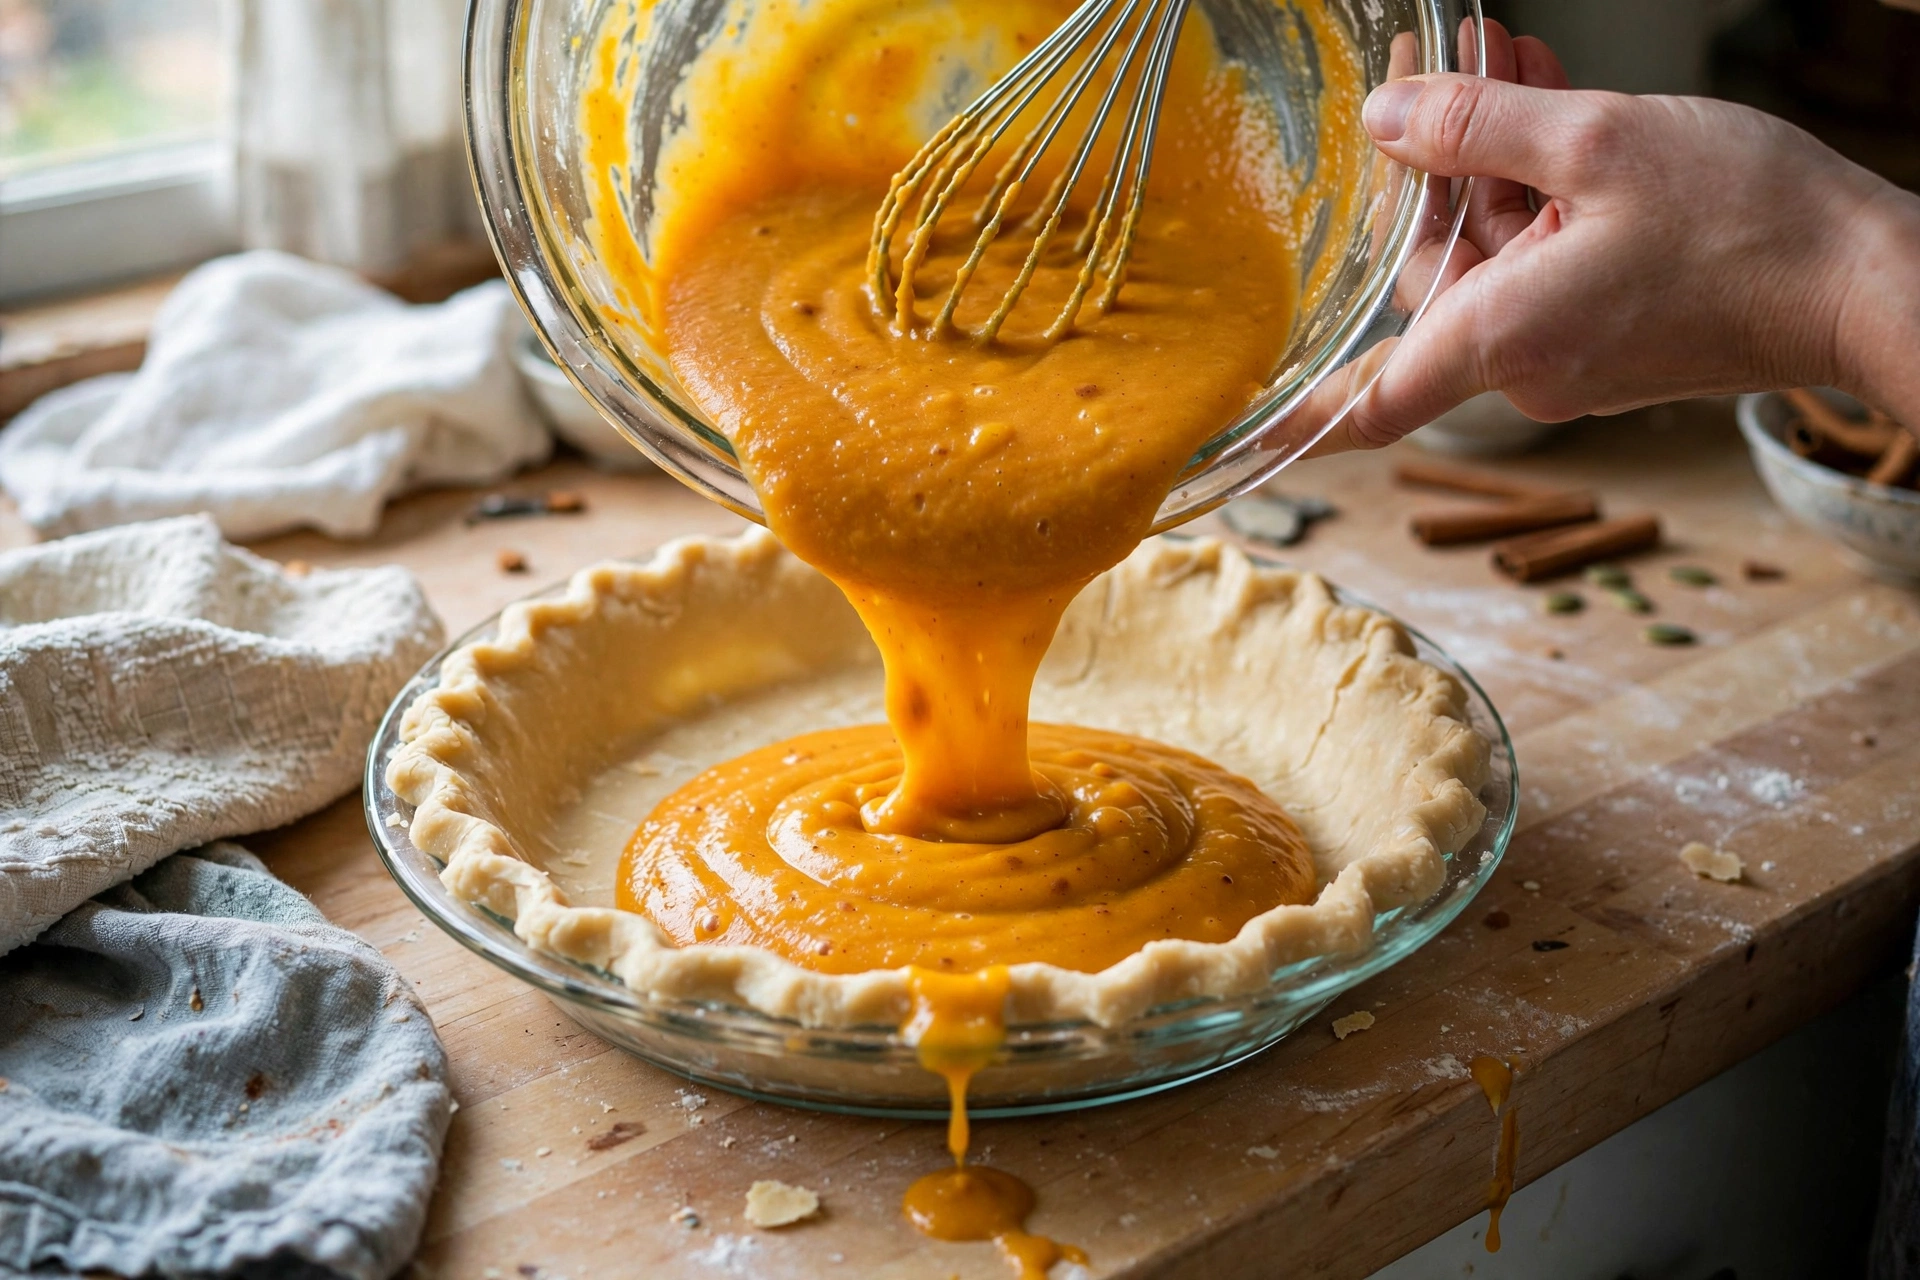
In a large bowl, whisk the 15 ounces of pumpkin puree until smooth. Add ¾ cup granulated sugar, 1 teaspoon cinnamon, ½ teaspoon ginger, ¼ teaspoon nutmeg, ⅛ teaspoon cloves, and ½ teaspoon salt; whisk until fully combined. Beat in 2 large eggs, one at a time, until just incorporated — don’t whip in a lot of air, which causes puffing and then sinking. Pour in the 12 ounces of evaporated milk and whisk gently until the filling is completely smooth and uniform in color. Give it a taste? Not recommended raw (it has raw egg), but it should smell deeply of warm spice.
5. Fill and start the hot bake
Set the chilled pie dish on the hot baking sheet in the oven. Pour the filling into the crust — it will come close to the top, which is fine. Bake at 425°F (220°C) for 15 minutes. You’ll see the crust edge starting to set and color.
6. Drop the temperature and finish gently
Without opening the oven door more than necessary, reduce the heat to 350°F (175°C) and continue baking for 40 to 50 minutes. At the 25-minute mark of this phase, check the crust edge — if it’s browning too fast, lay a pie shield or foil strips over the rim. The pie is done when the edges are set and puffed slightly but the very center still jiggles like set gelatin when you nudge the pan — a 2- to 3-inch wobbly circle in the middle. It will look underdone. It is not. The residual heat finishes the job as it cools, and this is exactly how you avoid cracks.
7. Cool completely — don’t rush it
Transfer the pie (on its baking sheet) to a wire rack and cool at room temperature for at least 2 hours. The custard continues to set during this time; slicing early gives you pumpkin soup. After 2 hours, the center should be fully set with no jiggle. Cooling too fast (like moving it straight to the fridge) can cause the surface to crack as it contracts, so let room temperature do the first stage of the work.
8. Chill, slice, and serve
Once fully cool, refrigerate the pie uncovered for at least 1 hour (or cover loosely once cold and chill up to overnight — the flavor deepens). Serve cold or at cool room temperature with lightly sweetened whipped cream. For clean slices, dip a sharp knife in hot water and wipe it between cuts.
Pro Tips for a Perfect (Crack-Free) Pumpkin Pie
Trust the jiggle. The single most common pumpkin pie mistake is overbaking. A fully set-looking pie coming out of the oven is already overdone — it will crack as it cools and the texture turns from silky to grainy. Pull it when the center still wobbles. The carryover heat is real, and it finishes the custard gently.
Don’t open the oven during the first 30 minutes. Every peek drops the temperature and extends the bake, which is how custards curdle at the edges. Use the oven light. Set a timer. Walk away.
The hot start matters more than blind baking. Starting at 425°F sets the bottom crust before the liquid filling can saturate it. If you’ve been blind-baking out of soggy-bottom fear, try the hot start first — it’s less work and honestly more effective for a wet custard filling.
Shield the rim. The thin crimped edge browns far faster than the filling sets. A pie shield or simple foil strips at the 25-minute mark of the low-temp phase keeps the edge golden instead of burnt. If you don’t own a shield, fold a square of foil in quarters, cut out the center, and unfold it into a ring.
Cool it slowly. Moving a hot custard pie straight into a cold fridge is a top cause of surface cracks — the outside contracts faster than the inside. Two hours on the counter first, then the fridge. Patience is a structural ingredient here.
Spice freshness counts. If your cinnamon has been open since last Thanksgiving, this is the pie that will expose it. Ground spices fade significantly after 8–12 months. For the brightest flavor, open fresh jars for the holiday baking season.
Don’t whip the filling. Whisk just until smooth. Beaten-in air expands in the oven and then collapses, which can crack the surface and give the custard a foamy, uneven texture.
Glass dish = visibility. A glass pie dish lets you check that the bottom crust is actually browning — peek through the oven light at the underside near the end of baking. Pale and flabby underneath means it needed more hot-start time (note it for next time).
Variations
Maple Pumpkin Pie
Replace the granulated sugar with ¾ cup pure maple syrup and reduce the evaporated milk to 1 cup (240 ml) to compensate for the extra liquid. The maple adds a deep, almost caramel note that pairs beautifully with the spices. Use real maple syrup — pancake syrup is just flavored corn syrup and will taste flat here.
Gingersnap Crust Pumpkin Pie
Swap the pastry crust for a press-in gingersnap crust: mix 1½ cups gingersnap crumbs with 6 tablespoons melted butter and 2 tablespoons sugar, press firmly into the pie dish, and bake at 350°F (175°C) for 10 minutes before filling. The spicy-sweet crust against the creamy filling is a fantastic contrast, and there’s no rolling involved. Reduce the added ginger in the filling to ¼ teaspoon so the spice doesn’t double up.
Brown Butter Pumpkin Pie
Brown the butter for the crust (or melt and brown 4 tablespoons of butter and whisk it into the filling). Browning cooks the milk solids until nutty and amber, adding a toffee-like depth. If browning for the filling, let it cool slightly before whisking in so it doesn’t scramble the eggs. This is the “secret ingredient” version — people will ask what makes it taste so good.
Sweetened Condensed Milk Version
Prefer a richer, sweeter pie? Use one 14-ounce can of sweetened condensed milk instead of evaporated milk, and cut the granulated sugar to ¼ cup. The condensed milk’s cooked-milk caramel notes make the pie taste almost like pumpkin flan. Everything else stays the same.
Mini Pumpkin Pies
Roll the crust dough out and cut 3½-inch rounds; press them into a standard muffin tin. Fill each about three-quarters full and bake at 350°F (175°C) for 25–30 minutes, until the centers barely jiggle. One recipe makes about 12 minis — perfect for parties where everyone wants their own pie. They’re also easier to transport than a full pie.
No-Roll Press-In Crust
If rolling pie dough sounds miserable, make a press-in crust: stir 1½ cups flour, ½ cup melted butter, 2 tablespoons sugar, and ¼ teaspoon salt until crumbly, then press firmly and evenly into the pie dish. Bake at 375°F (190°C) for 12 minutes before filling. It won’t be flaky like a real pastry crust, but it’s buttery, crisp, and genuinely good — and it takes five minutes.
Bourbon-Spiked Pumpkin Pie
Add 2 tablespoons of bourbon to the filling with the evaporated milk. The alcohol bakes off, leaving a warm vanilla-oak note that deepens the spice blend. A tablespoon of dark rum works the same way.
Ingredient Substitutions
- No evaporated milk? Half-and-half works as a 1:1 swap — the pie will be slightly less rich but still excellent. Heavy cream makes an even silkier, richer custard (use 1½ cups). Whole milk works in a pinch, but the custard sets a little softer and takes a few extra minutes; avoid skim milk, which makes a watery filling.
- No pumpkin puree? Butternut squash puree is the closest substitute — roast, puree, and drain it well, then use the same amount. Sweet potato puree also works and makes a (technically) sweet potato pie with a very similar method. Do not use pumpkin pie filling unless you also cut the sugar and spices drastically.
- Gluten-free crust? Use your favorite gluten-free pie crust recipe or a store-bought GF crust — the filling itself is naturally gluten-free. A press-in almond flour crust (1½ cups almond flour + ¼ cup melted butter + 2 tablespoons sugar, baked 10 minutes at 350°F/175°C before filling) is excellent and naturally GF.
- Dairy-free? Use full-fat coconut milk (the canned kind, shaken well) in place of evaporated milk and a vegan butter-style crust. The coconut flavor is mild once baked with all that spice. The texture sets slightly softer — add an extra egg yolk for insurance.
- Reducing sugar? You can cut the sugar to ½ cup without structural problems — the pie will be less sweet and more pumpkin-forward, which some people prefer. Going below that affects the custard’s tenderness, so ½ cup is the floor.
- Egg-free? Custard without eggs is a different dessert. For an egg allergy, a pumpkin mousse pie (whipped cream folded into sweetened pumpkin with gelatin) is a better target than trying to force this custard to set — this particular recipe depends on egg protein.
Dietary Notes
As written, this pie is vegetarian. The filling itself is naturally gluten-free — only the wheat crust contains gluten, so a GF crust swap makes the whole pie gluten-free. For nut-free needs, the standard recipe is safe as written (just check your crust ingredients if using store-bought). This is a holiday dessert, not a health food — the nutrition estimates in the recipe card are honest per-slice numbers for planning, not a claim of virtue. For lower-sugar needs, see the ½-cup sugar note in substitutions above; for dairy-free, the coconut milk swap works well.
Make-Ahead, Storage & Freezing
Make ahead: Pumpkin pie is one of the best make-ahead Thanksgiving desserts in existence. Bake it completely 1–2 days before serving — the flavor actually improves as the spices meld, and the custard sets up perfectly. Cool fully, cover loosely (tent foil so it doesn’t touch the surface), and refrigerate. Serve cold or let it sit at room temperature for 30–45 minutes before slicing.
Storage: Refrigerate leftovers promptly — custard pies are perishable. Tightly covered, the pie keeps 3–4 days in the refrigerator. The crust softens slightly by day 3 but the flavor holds. Never leave pumpkin pie at room temperature for more than 2 hours (food safety — it’s an egg-and-dairy custard).
Freezing: Baked pumpkin pie freezes well for up to 1 month. Cool completely, wrap tightly in plastic wrap and then foil, and freeze. Thaw overnight in the refrigerator — never at room temperature. The texture stays remarkably good, though the crust loses a little crispness. Freeze it unsliced for the best results; slice after thawing. Do not freeze the unbaked filling.
Reheating/serving: Pumpkin pie is traditionally served cold or at room temperature — no reheating needed. If you like it slightly warm, a single slice can go in a 300°F (150°C) oven for 8–10 minutes, but warm the slice, not the whole pie, and don’t overdo it or the custard weeps.
Whipped cream timing: Whip the cream the day you serve, not days ahead — it deflates. Stabilized whipped cream (a teaspoon of powdered sugar + a little cornstarch, or a tablespoon of mascarpone beaten in) holds for 24 hours if you must make it ahead.
What to Serve With Classic Pumpkin Pie
Pumpkin pie rarely travels alone on Thanksgiving — it’s the finale of a whole spread. If you’re building the full holiday table, our Boursin mashed potatoes and sweet potato casserole are the savory anchors this pie was born to follow, and cornbread casserole rounds out the side-dish lineup.
For a fall party spread rather than the full Thanksgiving production, pair slices of this pie with our pumpkin cheese ball as the appetizer — the pumpkin theme ties the whole table together — and mummy hot dogs if there are kids in the mix. And for the cook who wants one more make-ahead win on the dessert table, the almond joy cookies bake up fast while the pie cools.
Browse the recipe collection for the rest of the holiday lineup as it publishes.
Recipe Notes
- Use 100% pumpkin puree, NOT pumpkin pie filling — check the can label.
- Pull the pie when the center still jiggles (2–3 inch wobbly circle); carryover heat finishes it.
- Start at 425°F (220°C) for 15 minutes, then drop to 350°F (175°C) — the hot start prevents a soggy bottom.
- Cool 2 hours at room temperature before refrigerating; fast cooling can crack the surface.
- Refrigerate within 2 hours — it’s an egg-and-dairy custard.
- Fresh spices make a noticeable difference; replace ground spices yearly.
- For clean slices, use a hot, wiped knife between cuts.
Classic Pumpkin Pie — Silky, Spiced & Foolproof
Description
A flaky golden crust filled with silky spiced pumpkin custard — real pumpkin puree, eggs, evaporated milk, and warm cinnamon, ginger, nutmeg, and clove. The foolproof two-temperature bake means no cracks and no soggy bottom. The perfect make-ahead Thanksgiving dessert.
For the crust
For the filling
For serving
Instructions
-
Make crust dough
Make the crust: whisk flour and salt; cut in the cold butter to pea-sized pieces. Add ice water 1 tablespoon at a time until the dough holds together. Form into a disk, wrap, and chill 30 minutes. -
Roll out fit crust
Roll the dough to a 12-inch circle on a floured surface; fit into a 9-inch pie dish without stretching. Trim, fold under, and crimp the edge. Refrigerate 15 minutes. -
Heat oven two temperatures
Place a rimmed baking sheet on the lower-third oven rack and preheat the oven to 425°F (220°C). -
Whisk filling
Whisk the pumpkin puree smooth; whisk in the sugar, cinnamon, ginger, nutmeg, cloves, and salt. Beat in the eggs one at a time until just combined, then whisk in the evaporated milk until smooth. -
Fill and hot bake
Set the pie dish on the hot baking sheet; pour in the filling. Bake at 425°F (220°C) for 15 minutes. -
Drop temperature finish gently
Reduce the oven to 350°F (175°C) (keep the door closed as much as possible) and bake 40–50 minutes more, shielding the crust edge with foil if it browns too fast. The pie is done when the edges are set and the center still jiggles in a 2–3 inch circle. -
Cool then refrigerate
Cool on a wire rack at room temperature for at least 2 hours until fully set, then refrigerate at least 1 hour. Serve cold or at cool room temperature with whipped cream, slicing with a hot wiped knife.
Nutrition Facts
Servings 8
- Amount Per Serving
- Calories 315kcal
- % Daily Value *
- Total Fat 17g27%
- Saturated Fat 10g50%
- Cholesterol 85mg29%
- Sodium 280mg12%
- Total Carbohydrate 41g14%
- Dietary Fiber 2g8%
- Sugars 24g
- Protein 7g15%
* Percent Daily Values are based on a 2,000 calorie diet. Your daily value may be higher or lower depending on your calorie needs.
Note
Use 100% pumpkin puree, not pre-sweetened pumpkin pie filling. The center should jiggle when you pull it — carryover heat finishes the custard as it cools. Cool 2 hours at room temperature before refrigerating; rapid cooling can crack the surface. Refrigerate within 2 hours of baking; keeps 3–4 days refrigerated. Do not leave at room temperature longer than 2 hours (egg-and-dairy custard). Temperature: bake at 425°F (220°C) for 15 min, then 350°F (175°C) for 40–50 min. Food safety: this is an egg-and-dairy custard pie — refrigerate within 2 hours of baking and keep refrigerated. Do not taste the raw filling (it contains raw egg). Reheat single slices only, to steaming; do not reheat the whole pie repeatedly. Timing: 25 minutes prep (plus 45 minutes chilling), 60 minutes cook, 2 hours cooling/setting — 3 hours 10 minutes total. Estimated cost: ~$7.00 for the whole pie (about $0.90 per slice), based on typical US grocery prices, Oct 2026. Best season: Fall — October through November (Thanksgiving). Nutrition note: These are estimates calculated from the ingredient quantities in this recipe using standard USDA nutrition data, rounded for readability. Actual values vary with specific brands and measuring. This pie is a holiday dessert — enjoy it as part of a balanced celebration.