

Fluffy Dinner Rolls — Soft, Buttery & Impossible to Resist
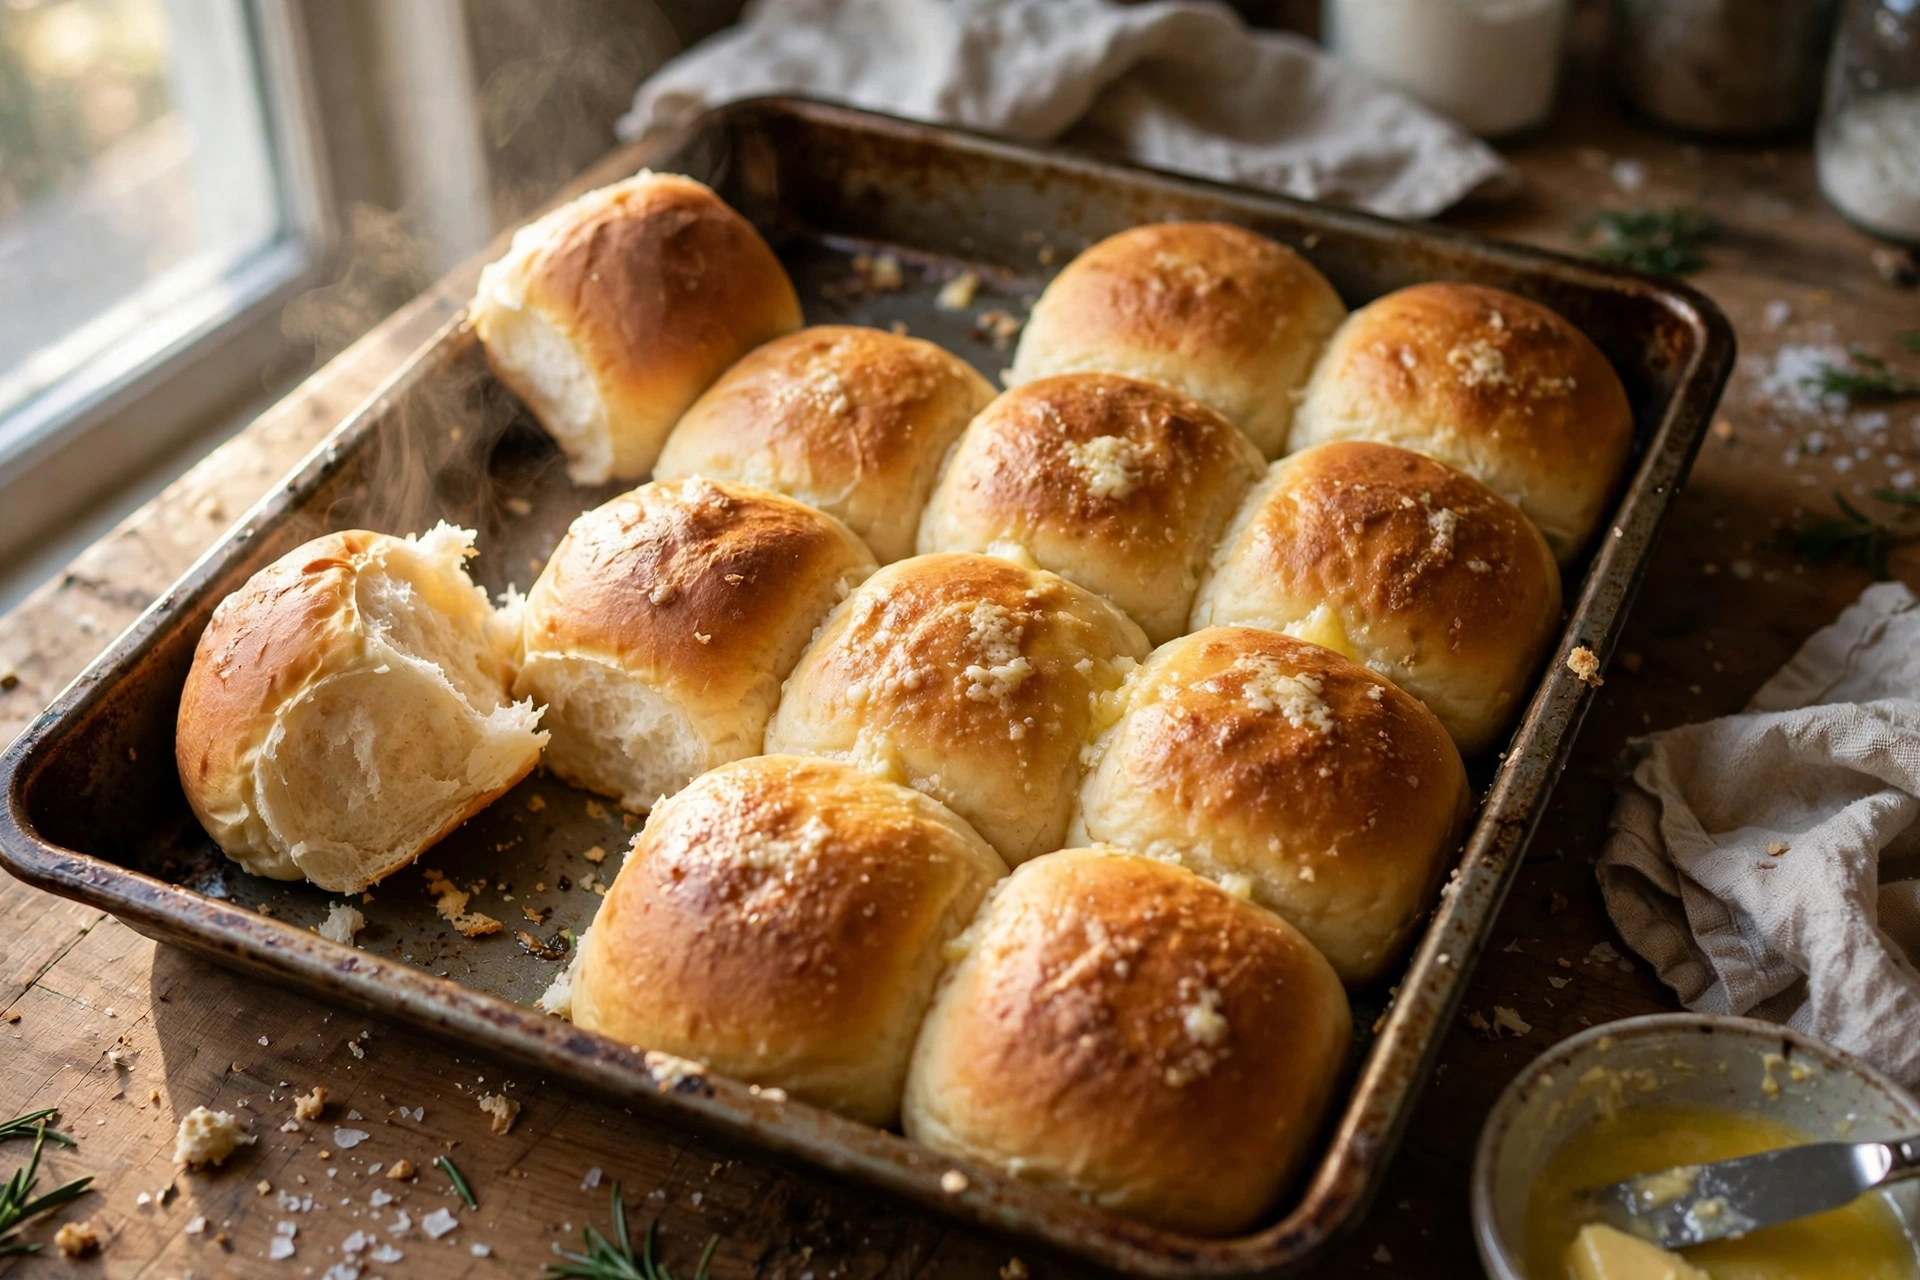
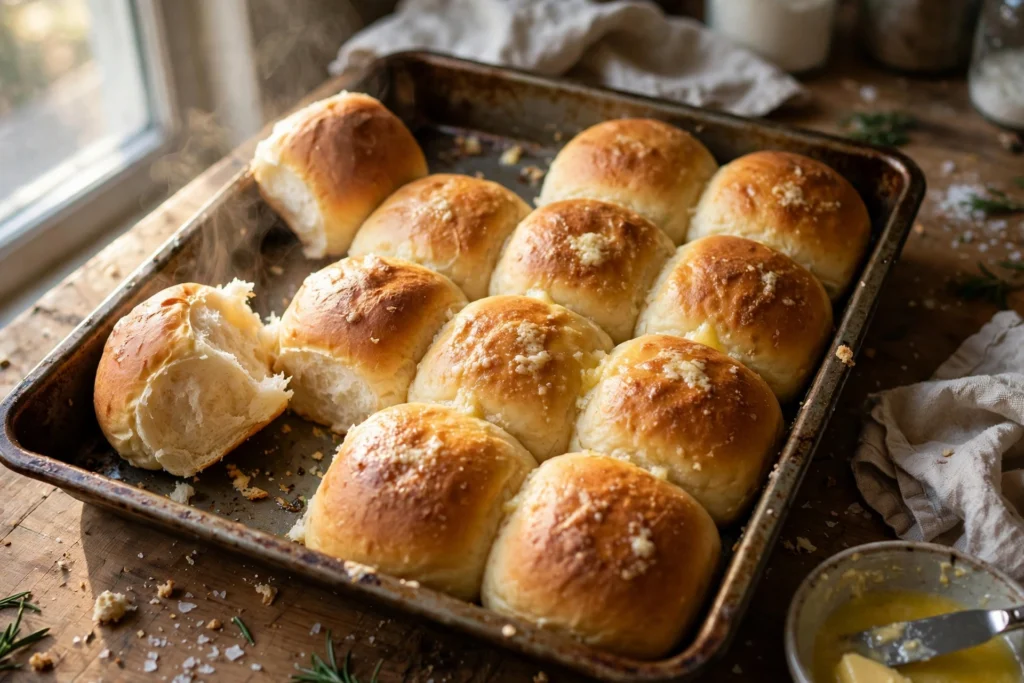
There’s a special kind of silence that falls over a dinner table when the rolls come out warm. This dinner rolls recipe is built to create that moment: a dozen pillowy-soft rolls with golden butter-brushed tops, a tender pull-apart crumb, and just enough sweetness to make everyone reach for a second one before the main dish is even served.
The structure of this recipe is deliberately simple — milk, butter, sugar, egg, flour, yeast, salt — but the method is where the magic happens. The dough gets two patient rises, a gentle shaping technique that keeps every roll uniform, and a butter brush both before and after baking. That’s the whole secret to homemade dinner rolls that look bakery-worthy and stay soft for days.
If yeast bread has ever intimidated you, this is the recipe to change your mind. There’s no tangzhong, no stand mixer required (though you can use one), no overnight cold ferment. Just one bowl, one 9×13 pan, and about two hours of mostly hands-off rising time. Whether you need Thanksgiving dinner rolls or an everyday side that outshines the main course, start here.
Table of Contents
Why You’ll Love This Dinner Rolls Recipe
- Pillowy-soft texture: A rich, enriched dough with milk, butter, and egg bakes up tender with a fine, even crumb — never dense, never dry.
- Beginner-friendly: One bowl, no mixer required, and clear visual cues for every rise. If you can stir, you can make these.
- Golden buttered tops: A double butter brushing — before and after baking — gives that glossy, bakery-case finish and keeps the crust soft.
- Make-ahead ready: Shape them in the morning, refrigerate overnight, and bake before dinner. Or freeze baked rolls for up to 3 months.
- Holiday hero, weeknight easy: Equally at home next to a Thanksgiving turkey or a Tuesday-night soup.
Ingredients You’ll Need
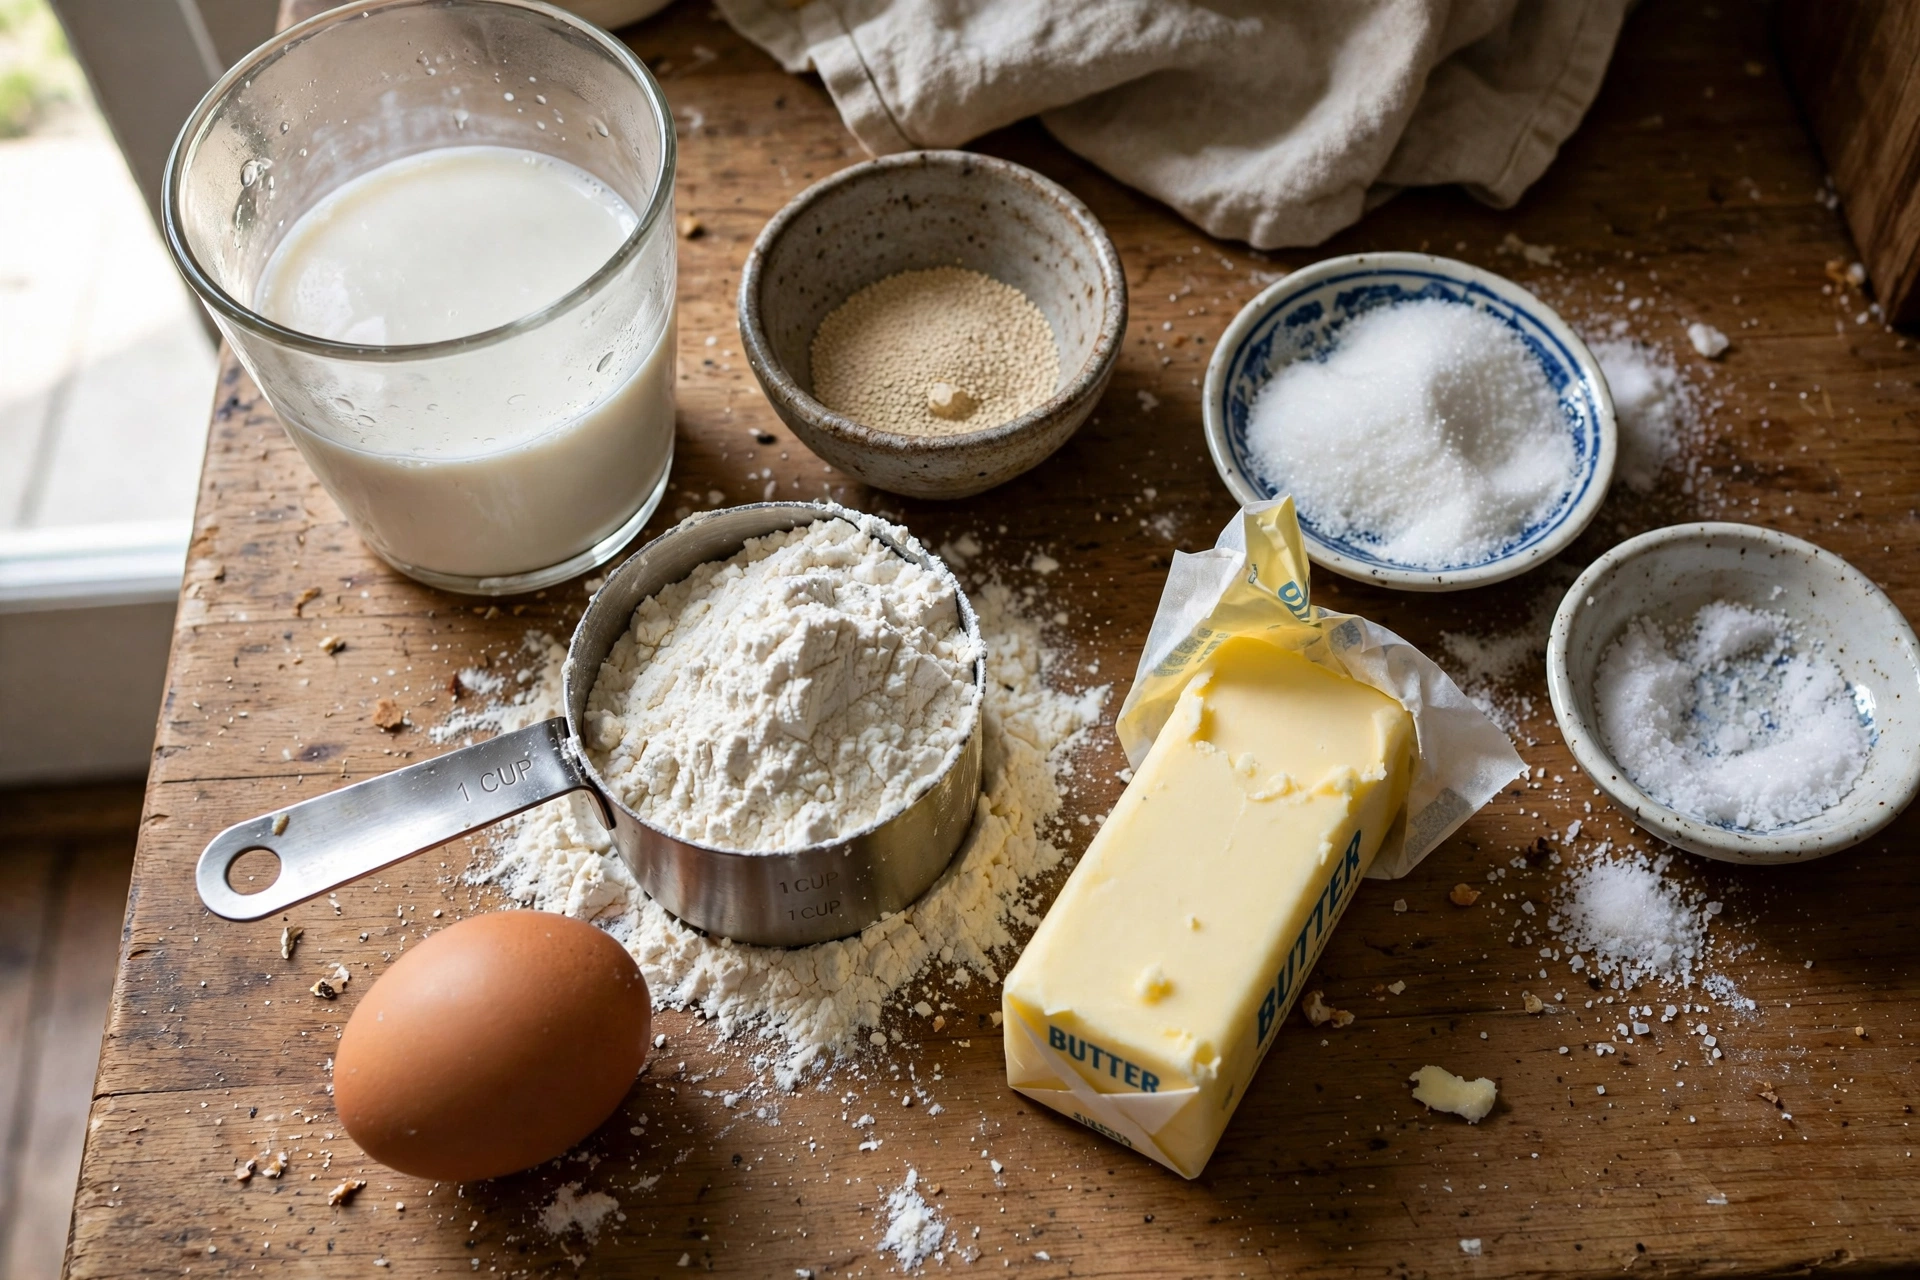
Each ingredient in this dinner rolls recipe has a job. Here’s what they do and why the amounts matter.
Warm Whole Milk (1 cup)
Whole milk is what makes these rolls rich instead of just soft. The milk fat tenderizes the crumb and adds flavor that water-based doughs simply can’t match. Warm it to about 110°F (43°C) — warm to the touch, not hot. Hot milk kills yeast; cold milk stalls the bloom. If you don’t have a thermometer, it should feel like comfortable bath water on the inside of your wrist.
Active Dry Yeast (2¼ teaspoons / 1 packet)
One standard packet of active dry yeast is all you need for 12 rolls. You’ll proof it in the warm milk with a spoonful of sugar first, which does two things: it confirms your yeast is alive (foamy after 5–10 minutes = good), and it wakes the yeast up so the first rise starts fast. Instant yeast also works — you can skip the blooming step and mix it straight into the flour, though the rise times stay roughly the same.
Granulated Sugar (⅓ cup)
Sugar feeds the yeast, which is what produces the lift — but in this enriched dough it also contributes to the golden color and that faint sweetness that makes dinner rolls so craveable. Don’t reduce it much below ¼ cup or the rise will be noticeably slower.
Large Egg, Room Temperature (1)
The egg adds richness, structure, and that beautiful golden color to the crumb. Room temperature matters: a cold egg straight from the fridge will cool the dough and slow everything down. Set it in a bowl of warm water for 5 minutes if you forgot to take it out.
Unsalted Butter, Melted (⅓ cup) — Plus More for Brushing
Butter is the flavor backbone here — melted butter mixed into the dough, plus softened butter brushed on before baking and again the moment the rolls come out of the oven. That final hot-brush is non-negotiable: it melts into the crust, keeping it soft and glossy instead of crisp. Use unsalted so you control the salt.
All-Purpose Flour (4 cups / 480g)
Plain all-purpose flour is perfect — no need for bread flour. AP flour has enough protein for a soft, stretchy crumb without making the rolls chewy. For best accuracy, weigh your flour (480g); scooping can pack in an extra ½ cup without you noticing, which makes the rolls heavy. If measuring by cups, fluff the flour, spoon it into the cup, and level off.
Fine Sea Salt (1 teaspoon)
Salt does three jobs: it flavors the dough, it strengthens the gluten network, and it regulates the yeast so the rise stays controlled instead of frantic. Add it with the flour, not directly onto the yeast — salt in direct contact with yeast can slow the bloom.
Recommended Equipment
- Large mixing bowl (the dough needs room to grow)
- Instant-read thermometer (optional but takes the guesswork out of milk temperature)
- 9×13-inch metal baking pan
- Plastic wrap or a clean damp kitchen towel (for covering the rises)
- Bench scraper (optional — makes dividing the dough clean and fast)
- Pastry brush (for the butter)
- Cooling rack
No stand mixer is needed. The dough comes together with a wooden spoon and about 8–10 minutes of hand kneading. That said, if you own a mixer, a dough hook on low speed for 5–6 minutes does the job just as well.
How to Make Fluffy Dinner Rolls
Step 1: Wake Up the Yeast
Pour the warm milk (110°F / 43°C) into your large mixing bowl. Stir in 1 teaspoon of the measured sugar and sprinkle the yeast over the top. Give it a gentle stir, then let it sit undisturbed for 5 to 10 minutes. You should see it turn foamy and fragrant — that’s your proof the yeast is alive and working. If nothing happens after 10 minutes, the milk was likely too hot or the yeast is expired: start over with fresh yeast rather than wasting the rest of the ingredients.
Step 2: Mix the Soft, Enriched Dough
To the foamy yeast mixture, whisk in the remaining sugar, the beaten room-temperature egg, and the melted butter (cooled slightly so it doesn’t scramble the egg). Now add 3 cups of the flour and the salt, stirring with a wooden spoon until a shaggy dough forms. Add the remaining cup of flour a little at a time — you want a soft, slightly tacky dough, not a stiff one. Stop adding flour when the dough pulls away from the sides of the bowl but still sticks slightly to your fingers. A little tackiness is good; dry, firm dough makes dense rolls.
Step 3: Knead Until Silky and Elastic
Turn the dough out onto a lightly floured counter and knead for 8 to 10 minutes. Use the heel of your hand to push the dough away, fold it back over itself, give it a quarter turn, and repeat. The transformation is satisfying to watch: the dough goes from rough and shaggy to smooth, silky, and elastic. You’ll know it’s ready when it springs back slowly after you poke it with a finger, and when a small piece can stretch thin enough to let light through without tearing (the “windowpane test”). Resist the urge to add more flour than a light dusting — the dough gets less sticky as the gluten develops.
Step 4: First Rise — Let the Dough Double
Shape the kneaded dough into a ball and place it in a lightly oiled bowl, turning it once so the top is coated too. Cover with plastic wrap or a damp towel and set it in a warm, draft-free spot — the inside of an off oven with the light on is ideal. Let it rise for 1 to 1½ hours, until doubled in size. Warm kitchens rise faster; cool kitchens take longer. Go by volume, not the clock: the dough should look puffy and a finger poked in should leave an indent that slowly fills back in about halfway.
Step 5: Divide and Shape the Rolls
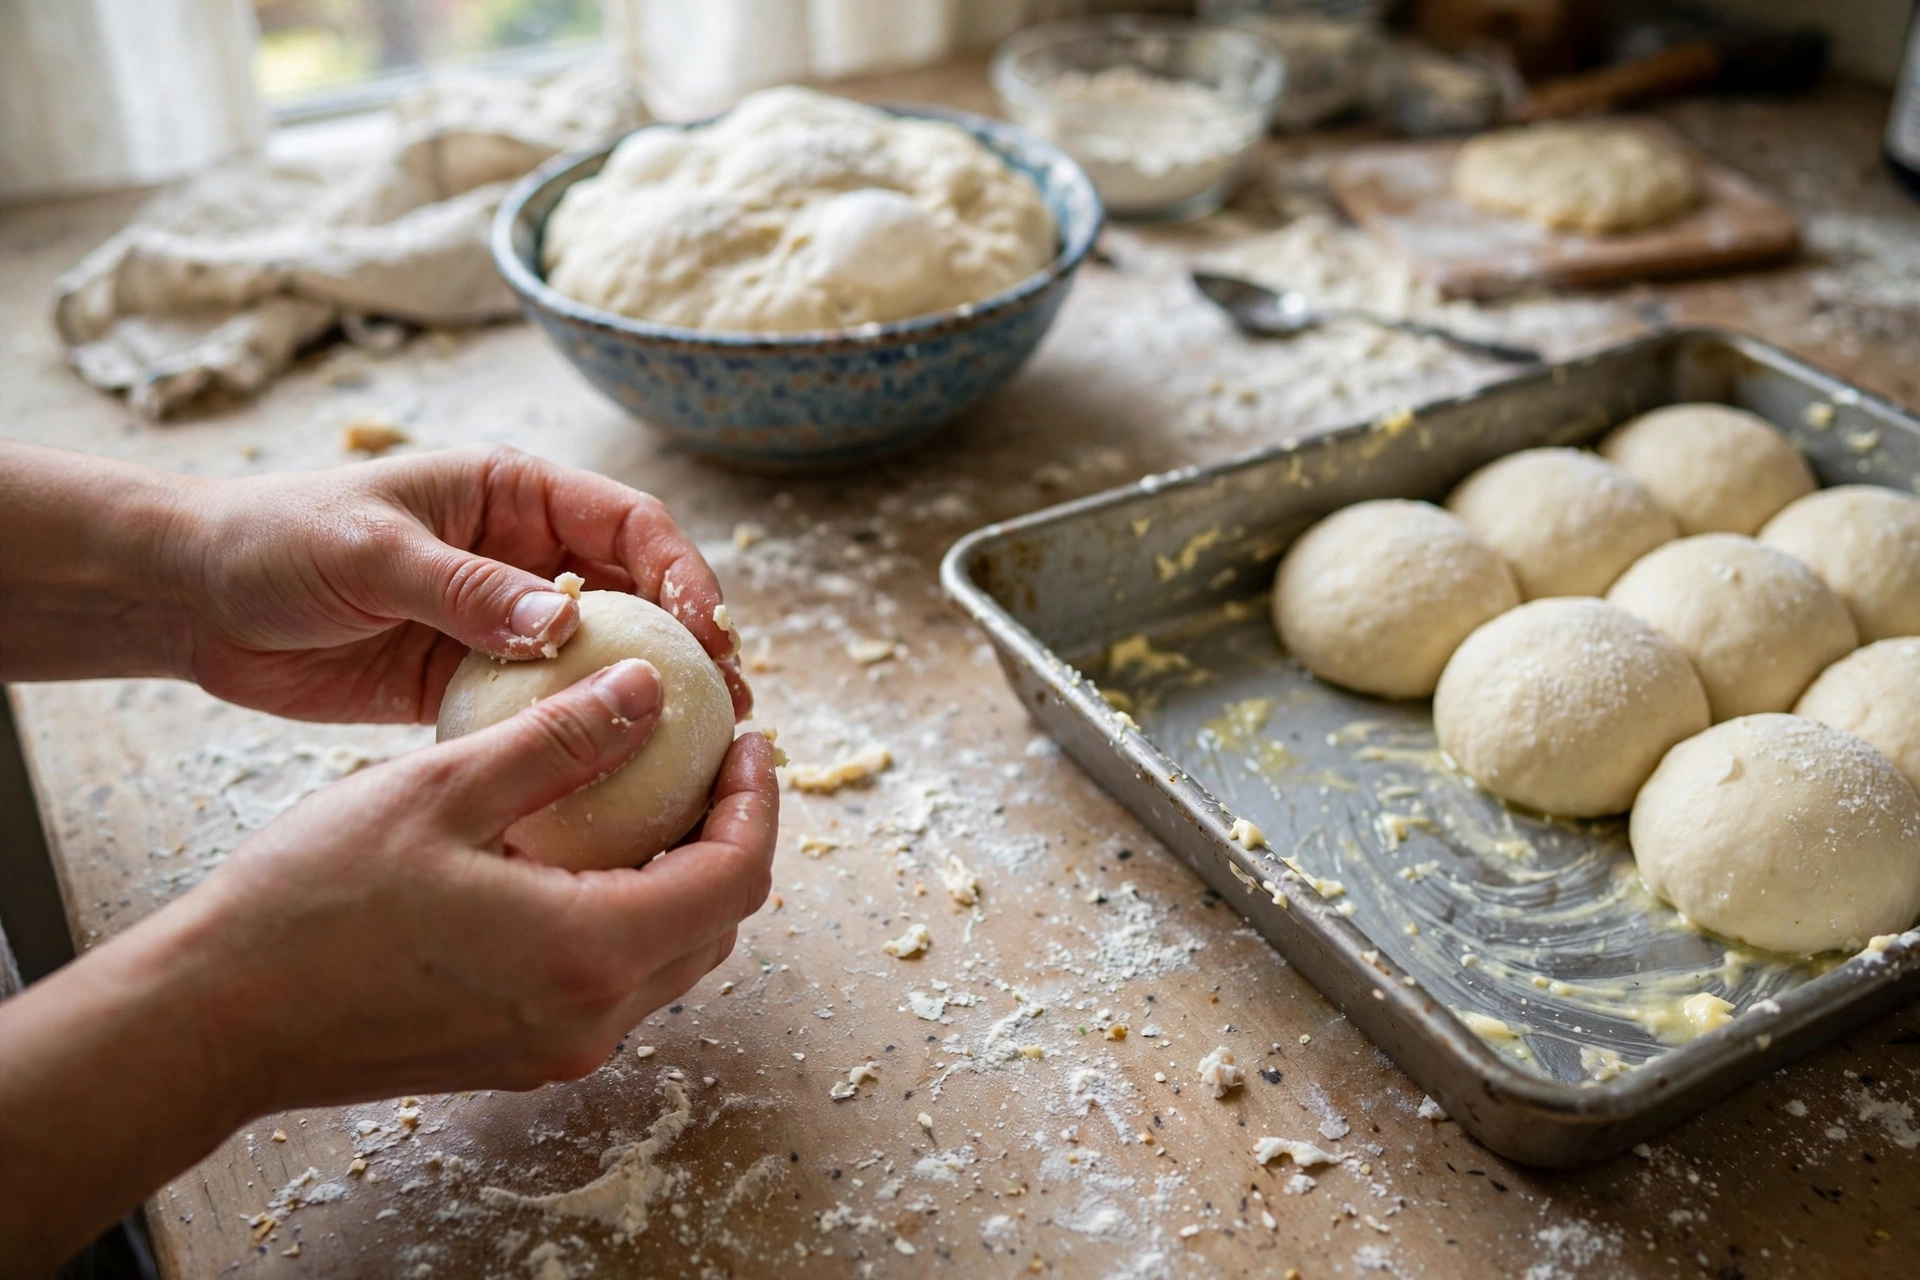
Punch the risen dough down gently to release the air, then turn it onto a lightly floured surface. Pat it into a rough 12-inch log and use a bench scraper or knife to divide it into 12 equal pieces (about 75–80g each if you’re weighing — uniform pieces bake evenly). Shape each piece into a smooth ball: flatten it slightly, fold the edges into the center, pinch to seal, then cup your hand over it and roll it on the counter in a circular motion until the top is taut and smooth. Arrange the shaped rolls in a buttered 9×13-inch pan, spaced about 1 inch apart — they’ll expand to touch as they rise, which gives you those classic pull-apart sides.
Step 6: Second Rise in the Pan
Cover the pan loosely with plastic wrap or a damp towel and let the rolls rise in a warm spot for 45 to 60 minutes, until visibly puffy and nearly touching. They should look like they’re crowding each other — that’s exactly what you want for pull-apart rolls. This second rise is what gives the rolls their light, airy texture, so don’t rush it. In the last 15 minutes of the rise, preheat your oven to 375°F (190°C) and brush the tops of the rolls gently with softened butter.
Step 7: Bake to Golden, Then Brush with More Butter
Bake for 20 to 25 minutes, until the tops are deeply golden brown and the rolls sound hollow when you tap one. An instant-read thermometer in the center roll should read about 190°F (88°C). The moment they come out of the oven, brush the tops generously with more softened butter — this is what keeps the crust soft and gives them that irresistible sheen. Let the rolls cool in the pan for about 10 minutes (they’re molten inside), then turn out onto a rack or serve warm straight from the pan. Pull them apart and watch the steam rise.
Pro Tips for Perfect Dinner Rolls
Weigh your flour. Volume measurements can vary by 20% or more depending on how you scoop. 480g of all-purpose flour is the same every time, and it’s the single biggest upgrade to consistent rolls. A cheap kitchen scale pays for itself with this recipe alone.
Don’t over-flour the kneading surface. A lightly dusted counter is all you need. Extra flour worked into the dough during kneading throws off the hydration and makes dense, heavy rolls. The dough should feel soft and slightly tacky — trust it.
Create a warm spot for rising. If your kitchen runs cool, the turned-off oven with just the light on is the perfect 75–80°F proofing box. Cold drafts slow the rise and can even stall it; a consistently warm spot is more important than a perfectly warm spot.
Uniform pieces bake uniformly. When all 12 rolls are the same size, they finish at the same time — no raw middles on the big ones and dry edges on the small ones. A scale helps, but even eyeballing carefully with a bench scraper makes a real difference.
Serve them warm. Dinner rolls are at their absolute peak in the first 30 minutes out of the oven — soft, steamy, melting the butter you spread on them. Time your bake to finish about 15 minutes before the meal.
Variations
Garlic Herb Rolls
Brush the baked rolls with butter melted with 2 minced garlic cloves, 1 tablespoon chopped fresh parsley, and a pinch of flaky salt instead of plain butter. Serve with marinara or alongside pasta night — they taste like the bread basket at a great Italian restaurant.
Honey Butter Rolls
Swap 2 tablespoons of the granulated sugar for honey in the dough, and brush the hot rolls with a mix of 3 tablespoons softened butter and 2 tablespoons honey. The honey deepens the golden color and adds a gentle floral sweetness.
Cheesy Stuffed Rolls
Flatten each dough piece, place a small cube of mozzarella (about ¾ inch) in the center, wrap the dough around it, and pinch firmly to seal before rolling into a ball. They bake up like little cheese bombs — make sure the seal is underneath when you place them in the pan, or the cheese will escape.
Whole Wheat Honey Rolls
Replace 1½ cups of the all-purpose flour with white whole wheat flour and swap the sugar for ⅓ cup honey. They’ll be a touch denser with a nutty flavor — still soft, still delicious. Whole wheat absorbs more liquid, so let the dough rest 10 minutes after mixing and add a tablespoon of milk if it feels dry.
Ingredient Substitutions
No whole milk? 2% milk works with a barely noticeable difference. In a pinch, evaporated milk thinned half-and-half with water also works. Skip skim milk — the fat really matters for tenderness.
No active dry yeast? Use instant (rapid-rise) yeast in the same amount and skip the blooming step: whisk it directly into the flour. Rise times stay about the same, maybe 10 minutes faster.
Butter vs. oil? For dairy-free rolls, swap the melted butter for an equal amount of neutral oil (avocado or light olive) and use warm water instead of milk. They’ll be soft but less rich — brush with oil instead of butter after baking. The egg can stay or be replaced with 3 tablespoons of aquafaba.
Out of granulated sugar? An equal amount of honey or maple syrup works; both add flavor notes (honey is classic). Brown sugar works too and gives a faint caramel undertone.
Dietary Notes
These rolls are naturally vegetarian. For dairy-free rolls, use a plant-based butter (one that bakes well — look for sticks, not tubs) and replace the milk with unsweetened oat or soy milk warmed to the same temperature; the egg can be swapped for 3 tablespoons of aquafaba. The result is slightly less rich but still soft and golden. For gluten-free, this recipe isn’t a simple swap — yeast doughs rely on gluten for structure, so use a recipe formulated specifically for gluten-free bread flour blends (those with xanthan gum built in) rather than substituting here. The rolls contain wheat, milk, egg, and butter — flag all four for guests with allergies.
Make-Ahead, Storage & Freezing
Make ahead (overnight method): After shaping the rolls in the pan (end of Step 5), cover tightly and refrigerate overnight instead of doing the second rise at room temperature. The next day, let the pan sit at room temperature for about 60–75 minutes until the rolls look puffy and nearly doubled, then brush with butter and bake as directed. This is the ideal Thanksgiving strategy — fresh rolls with zero morning stress.
Storage: Cool rolls completely, then keep in an airtight container or zip-top bag at room temperature for up to 3 days. The double butter brushing keeps them soft far longer than plain rolls. After day 2, refresh them in a 300°F oven for 5 minutes.
Freezing (baked): Wrap cooled rolls individually in plastic wrap, then place in a freezer bag with the air pressed out. They keep up to 3 months. Thaw at room temperature for about an hour, then warm in a 300°F oven for 5–8 minutes to bring back the fresh-baked texture.
Freezing (unbaked): Shape the rolls, place them on a tray, freeze solid, then transfer to a freezer bag. Thaw in the refrigerator overnight, place in the buttered pan, and let them complete the second rise at room temperature (60–90 minutes) before baking.
Reheating: Warm rolls in a 300°F oven for 5–8 minutes, or split and toast cut-side down in a buttered skillet for 1–2 minutes (the skillet method is dangerously good). Avoid the microwave — it makes them rubbery.
What to Serve With Dinner Rolls
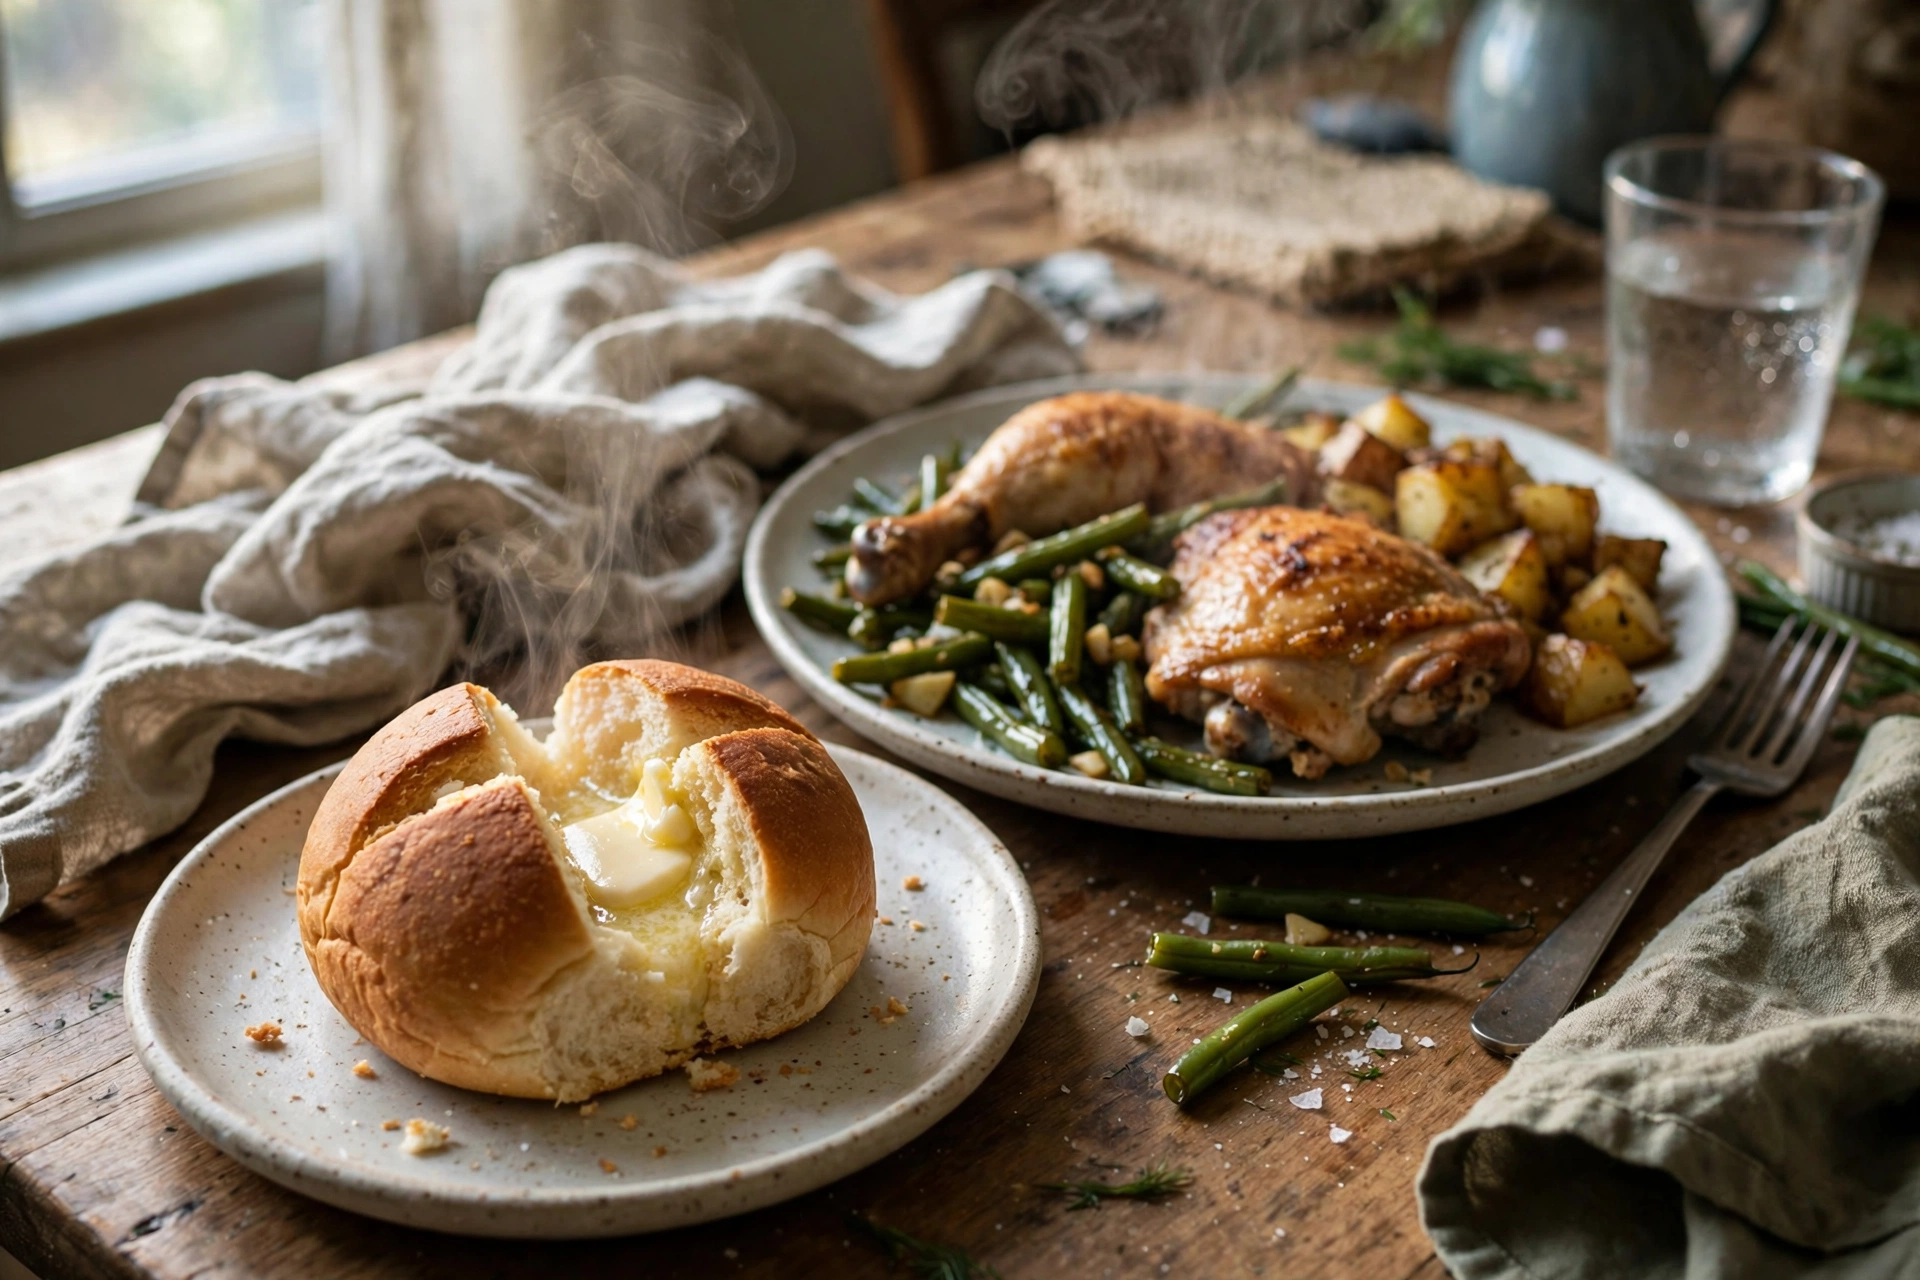
Homemade dinner rolls turn any spread into a feast. They’re the natural partner for holiday meals — pile them next to roast turkey, ham, or a pot roast and watch them vanish. For weeknights, they’re perfect for sopping up soups and stews, and they make excellent mini sandwich rolls for leftover turkey or pulled pork the next day.
For a full cozy dinner, pair these rolls with our KFC-style crispy fried chicken — the contrast of crunchy chicken and pillowy-soft bread is hard to beat. And if you’re building a holiday appetizer spread, our pumpkin cheese ball makes the perfect savory starter while the rolls bake. For spooky-season parties, the mummy hot dogs are a guaranteed crowd-pleaser alongside a basket of these warm rolls.
Recipe Notes
- Milk at 110°F (43°C) is the sweet spot for blooming yeast — warm to the wrist, never hot.
- Stop adding flour while the dough is slightly tacky; dry dough makes dense rolls.
- The windowpane test (Step 3) is the most reliable doneness check for kneading.
- Rise by volume, not by the clock — doubled in size is the goal in every warm spot.
- Brush baked rolls with butter the moment they leave the oven for a soft, glossy crust.
- Overnight refrigeration before the second rise is the best Thanksgiving make-ahead strategy.

Fluffy Dinner Rolls — Soft, Buttery & Impossible to Resist
Description
Pillowy-soft homemade dinner rolls with golden butter-brushed tops and a tender pull-apart crumb. One bowl, two patient rises, and about 20 minutes of hands-on work — the perfect dinner rolls recipe for Thanksgiving and every night in between.
Ingredients
Instructions
-
Wake Up the Yeast
Pour the warm milk (110°F / 43°C) into your large mixing bowl. Stir in 1 teaspoon of the measured sugar and sprinkle the yeast over the top. Give it a gentle stir, then let it sit undisturbed for 5 to 10 minutes. You should see it turn foamy and fragrant — that's your proof the yeast is alive and working. If nothing happens after 10 minutes, the milk was likely too hot or the yeast is expired: start over with fresh yeast rather than wasting the rest of the ingredients. -
Mix the Soft, Enriched Dough
To the foamy yeast mixture, whisk in the remaining sugar, the beaten room-temperature egg, and the melted butter (cooled slightly so it doesn't scramble the egg). Now add 3 cups of the flour and the salt, stirring with a wooden spoon until a shaggy dough forms. Add the remaining cup of flour a little at a time — you want a soft, slightly tacky dough, not a stiff one. Stop adding flour when the dough pulls away from the sides of the bowl but still sticks slightly to your fingers. A little tackiness is good; dry, firm dough makes dense rolls. -
Knead Until Silky and Elastic
Turn the dough out onto a lightly floured counter and knead for 8 to 10 minutes. Use the heel of your hand to push the dough away, fold it back over itself, give it a quarter turn, and repeat. The transformation is satisfying to watch: the dough goes from rough and shaggy to smooth, silky, and elastic. You'll know it's ready when it springs back slowly after you poke it with a finger, and when a small piece can stretch thin enough to let light through without tearing (the "windowpane test"). Resist the urge to add more flour than a light dusting — the dough gets less sticky as the gluten develops. -
First Rise — Let the Dough Double
Shape the kneaded dough into a ball and place it in a lightly oiled bowl, turning it once so the top is coated too. Cover with plastic wrap or a damp towel and set it in a warm, draft-free spot — the inside of an off oven with the light on is ideal. Let it rise for 1 to 1½ hours, until doubled in size. Warm kitchens rise faster; cool kitchens take longer. Go by volume, not the clock: the dough should look puffy and a finger poked in should leave an indent that slowly fills back in about halfway. -
Divide and Shape the Rolls
Punch the risen dough down gently to release the air, then turn it onto a lightly floured surface. Pat it into a rough 12-inch log and use a bench scraper or knife to divide it into 12 equal pieces (about 75–80g each if you're weighing — uniform pieces bake evenly). Shape each piece into a smooth ball: flatten it slightly, fold the edges into the center, pinch to seal, then cup your hand over it and roll it on the counter in a circular motion until the top is taut and smooth. Arrange the shaped rolls in a buttered 9×13-inch pan, spaced about 1 inch apart — they'll expand to touch as they rise, which gives you those classic pull-apart sides. -
Second Rise in the Pan
Cover the pan loosely with plastic wrap or a damp towel and let the rolls rise in a warm spot for 45 to 60 minutes, until visibly puffy and nearly touching. They should look like they're crowding each other — that's exactly what you want for pull-apart rolls. This second rise is what gives the rolls their light, airy texture, so don't rush it. In the last 15 minutes of the rise, preheat your oven to 375°F (190°C) and brush the tops of the rolls gently with softened butter. -
Bake to Golden, Then Brush with More Butter
Bake for 20 to 25 minutes, until the tops are deeply golden brown and the rolls sound hollow when you tap one. An instant-read thermometer in the center roll should read about 190°F (88°C). The moment they come out of the oven, brush the tops generously with more softened butter — this is what keeps the crust soft and gives them that irresistible sheen. Let the rolls cool in the pan for about 10 minutes (they're molten inside), then turn out onto a rack or serve warm straight from the pan. Pull them apart and watch the steam rise.
Note
Milk at 110°F is the sweet spot for blooming yeast — warm to the wrist, never hot.
Stop adding flour while the dough is slightly tacky; dry dough makes dense rolls.
For Thanksgiving, refrigerate shaped rolls overnight and do the second rise in the morning.
Contains wheat, milk, egg, and butter — flag all four for guests with allergies.
Bake at 375°F (190°C).
Best season: Fall & Winter (holiday baking season).
Estimated cost: ~$3.50 for 12 rolls (about 30¢ per roll).
Nutrition (per roll — honest estimate, calculated from the ingredients above)
These are estimates only, calculated from the ingredients in this recipe using standard USDA values. Actual values vary with exact ingredients and roll size.
Calories: ~235 kcal · Carbohydrates: ~38g · Protein: ~5.5g · Fat: ~7.5g (saturated ~4.5g) · Fiber: ~1.5g · Sugar: ~6g · Sodium: ~205mg
Food-Safety Notes: Cooked rolls are safe at room temperature for up to 2 days in an airtight container; refrigerate or freeze beyond that. Dough containing raw egg should not be tasted raw; wash hands and surfaces after handling raw dough. Reheat refrigerated leftovers to steaming-hot (165°F / 74°C) throughout if serving to young children, pregnant guests, or anyone immunocompromised.