


Chocolate lava cakes for two are small warm chocolate cakes with firm edges and a liquid chocolate center that flows when you cut in with a spoon. This recipe makes 2 cakes in 27 minutes total, and the center stays molten if you follow the ramekin-size bake chart below. You need one bowl, two ramekins, and six pantry ingredients.
That chart is the whole point of this post. Most lava cake recipes give one bake time and hope your ramekins match theirs. Ramekins do not match. A shallow 5 ounce ramekin and a tall 8 ounce ramekin need different times at the same oven temperature, and that gap is why so many first lava cakes come out either raw in the middle or baked solid all the way through. Here you pick your ramekin size, read your time, and bake with a clear visual cue for doneness.
The batter itself is simple. Melted chocolate and butter meet whisked eggs, sugar, and a spoonful of flour. The small amount of flour is what lets the outside set into cake while the middle stays liquid. No mixer is needed. A whisk and a bowl do the job, and the batter comes together in about 10 minutes.
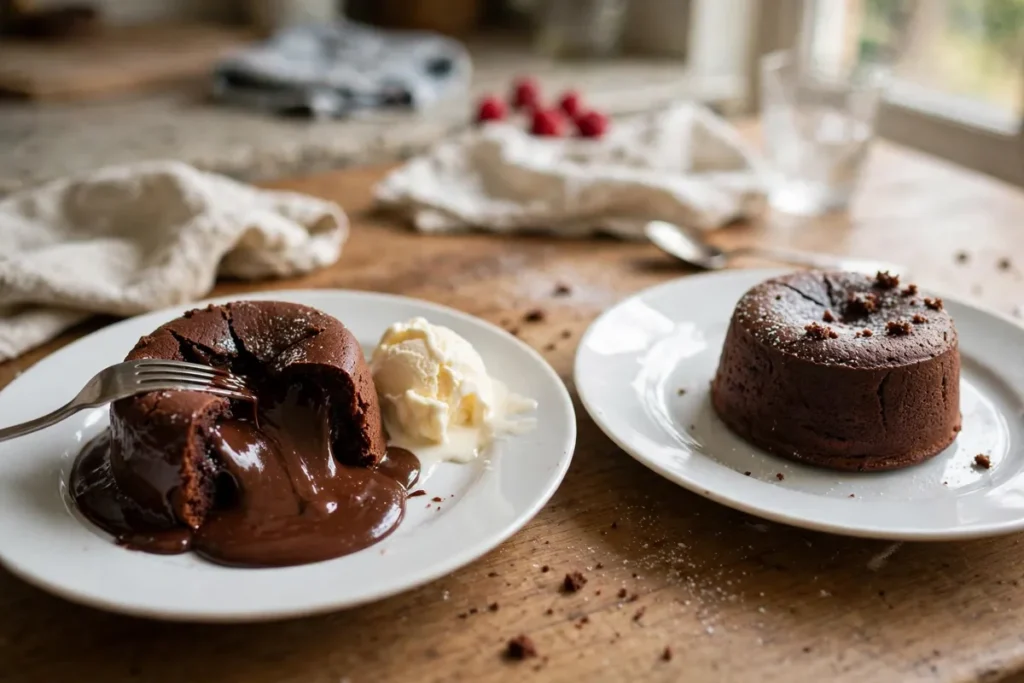
Table of Contents
Why You’ll Love These Chocolate Lava Cakes
- You get exactly two cakes, so there is no half pan of leftovers tempting you the next day.
- The full recipe takes 27 minutes from first melt to plated dessert, which fits a weeknight as well as a date night.
- The ramekin-size chart takes the guesswork out of the bake, which is where most lava cake attempts fail.
- The batter can be made ahead and kept in the fridge or freezer, so dessert can be baked fresh after dinner with no extra mixing.
- Each cake serves one person generously, and the recipe doubles cleanly if you need four.
Ingredients You’ll Need
Each ingredient below earns its place. The list is short on purpose, so the quality of the chocolate and the accuracy of the bake matter more than any extra add-in.
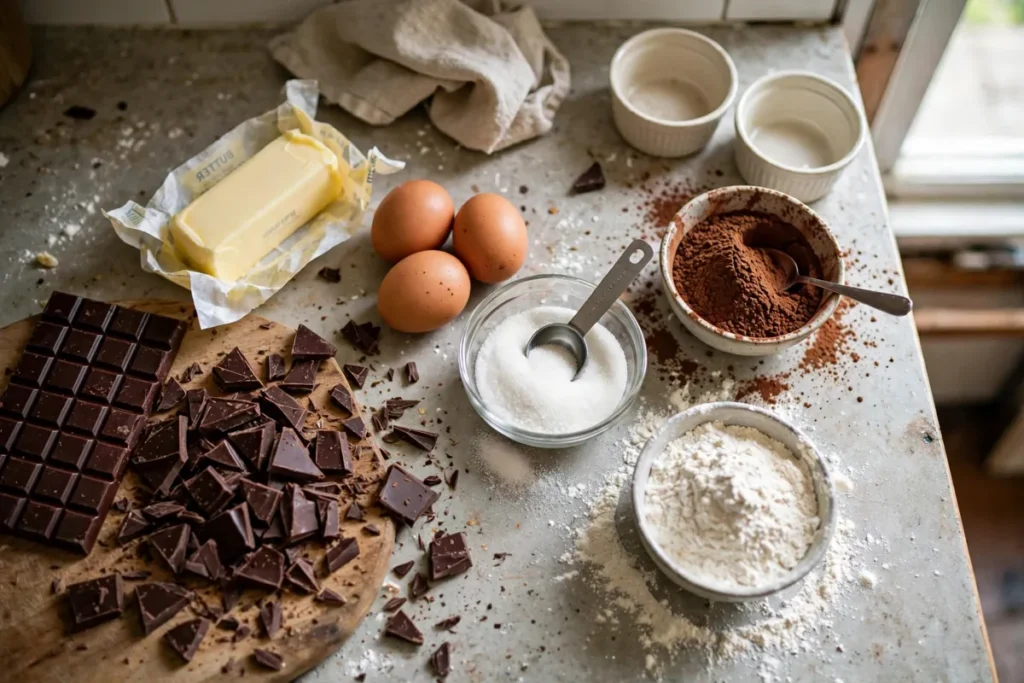
Semisweet Chocolate Bar: Use 3 ounces of a semisweet or dark chocolate bar, about 60 percent cacao, chopped. A bar melts into a smooth, even batter. Chocolate chips are made to hold their shape, and they often contain stabilizers that change the melt. If chips are all you have, they will still work, but a chopped bar gives a cleaner flow in the center. Keep the chocolate in the 55 to 70 percent range. Milk chocolate makes a sweeter, softer center. Chocolate above 70 percent makes a darker, more bitter center that some readers love and some find too intense.
Unsalted Butter: Use 4 tablespoons of unsalted butter for the batter, plus a little more for greasing the ramekins. Butter carries the chocolate flavor and gives the cake its rich crumb. Unsalted butter lets you control the salt with the pinch in the recipe. Salted butter works in a pinch, but then skip the added pinch of salt.
Egg and Egg Yolk: Use 1 large egg plus 1 large egg yolk, both at room temperature. The whole egg helps the edges set. The extra yolk adds richness and keeps the center thick and glossy instead of thin and runny. Cold eggs mix less evenly into warm chocolate, so set them out while you prep the ramekins. Fresh eggs matter here because the center stays soft by design, so read the food safety note in the recipe card before serving to guests who should avoid soft-cooked eggs.
Granulated Sugar: Use 3 tablespoons of granulated sugar. Sugar sweetens the batter and helps the top form a thin, lightly cracked crust. It also balances the bitterness of dark chocolate. Do not swap in powdered sugar for the batter. It changes the texture and can make the crumb gummy.
All-Purpose Flour: Use 2 tablespoons of all-purpose flour. That small amount is the structure of the whole recipe. It is enough flour to set the outer ring into cake and little enough that the middle stays liquid. Measure it level, not heaped. An extra spoonful can be the difference between a molten center and a plain chocolate muffin.
Cocoa Powder for Dusting: Use 1 teaspoon of unsweetened cocoa powder to dust the greased ramekins. The cocoa coats the butter layer and helps the cake release cleanly. It also adds a dark finish to the outside of the cake instead of the pale flour coating some recipes use. Any plain unsweetened cocoa works here.
Salt and Vanilla: Use a pinch of fine salt and half a teaspoon of vanilla extract. Salt sharpens the chocolate flavor. Vanilla rounds it out in the background. Neither should stand out on its own in the finished cake. If you taste vanilla first, you used too much.
Recommended Equipment
- Two 6 ounce ramekins (see the bake chart for other sizes)
- Small rimmed baking sheet
- Small heatproof bowl for melting chocolate
- Whisk
- Small spatula or spoon
- Butter knife or thin offset spatula for loosening
- Two dessert plates for unmolding
- Oven mitts, because the ramekins come out very hot
How to Make Chocolate Lava Cakes for Two
Read the bake chart in step 6 before you start. Pick your ramekin size first, then bake to that time. The rest of the method stays the same for every size.
- Heat the Oven and Prep the Ramekins: Heat the oven to 425 degrees Fahrenheit (220 degrees Celsius). Set the ramekins on a small rimmed baking sheet. The sheet makes them easy to move in and out of the oven without tipping. Grease the inside of each ramekin well with soft butter, getting into the bottom edge where the cake tends to stick. Add a pinch of cocoa to each ramekin, tilt and tap to coat the inside fully, then tap out the excess. Set the prepared ramekins aside.
- Melt the Chocolate and Butter: Put the chopped chocolate and the 4 tablespoons of butter in a small heatproof bowl. Microwave in 20 second bursts, stirring between each burst, until the mixture is smooth and glossy. This usually takes 40 to 60 seconds total. You can also melt them in a bowl set over a pot of barely simmering water, with the bowl clear of the water. Do not overheat the chocolate. Scorched chocolate turns grainy and dull, and it will not smooth out again. Let the melted mixture cool for 2 minutes so it does not scramble the eggs in the next step.
- Whisk the Egg, Yolk, and Sugar: Put the egg, egg yolk, sugar, salt, and vanilla in a medium bowl. Whisk for about 1 minute, until the mixture looks pale, slightly thick, and smooth. You do not need to beat it to a ribbon stage. You only need the sugar dissolved and the mixture uniform. A few streaks of yolk left in the bowl will show up as uneven color in the baked cake, so whisk until you see one even shade.
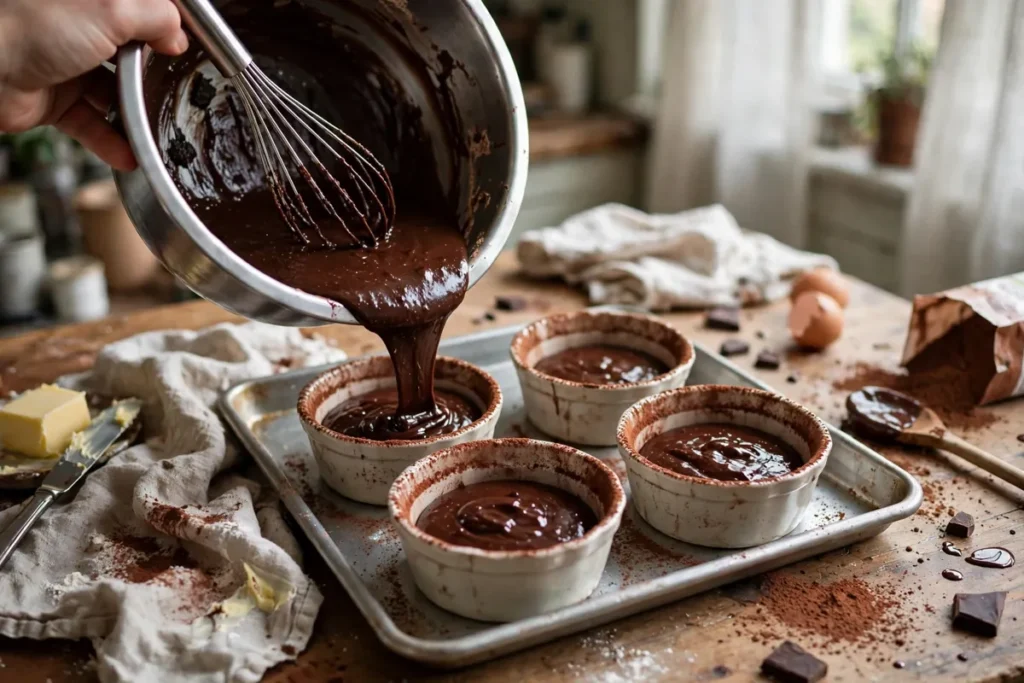
- Combine the Batter: Pour the warm (not hot) chocolate mixture into the egg mixture in a slow stream, whisking as you pour. Stir in the flour with a spatula until just combined, with no dry streaks left. Stop as soon as the flour disappears. Overmixing develops the flour and firms up the center, which is the opposite of what you want. The batter will be thick, dark, and glossy, and it will pour slowly off the spatula.
- Fill the Ramekins: Divide the batter evenly between the two prepared ramekins. Each 6 ounce ramekin should be about three quarters full. Do not fill to the top. The cakes rise as they bake, and a full ramekin will spill over the edge and burn on the sheet. Tap each ramekin gently on the counter once to settle the batter and pop any large air bubbles.
- Bake Until the Edges Set: Bake on the middle rack until the edges look set and puffed and the center still jiggles slightly when you shake the sheet gently. Use this chart for 425 degrees Fahrenheit: 5 ounce ramekins: bake 10 to 11 minutes; 6 ounce ramekins: bake 12 to 13 minutes; 8 ounce tall ramekins: bake 14 to 16 minutes. The top will look dry and lightly cracked at the edges. The very center may look a touch soft or sunken. That soft look is correct. A top that looks fully firm and domed all the way across usually means the center has already set. Start checking one minute before the end of your range. Ovens run hot or cold, and one minute is a real difference at this size.
- Rest, Loosen, and Unmold: Let the cakes rest in their ramekins for exactly 1 minute. That minute lets the outer ring firm up just enough to hold its shape. Resting longer lets the center keep cooking in the hot ramekin, and you lose lava. Run a thin knife around the inside edge of each ramekin. Place a dessert plate upside down over the ramekin, hold both together with oven mitts, and flip them in one confident motion. Wait 10 seconds, then lift the ramekin straight up. If a cake sticks, set the ramekin back down, run the knife around again, and flip once more. Serve the cakes in their ramekins instead if a cake will not release. The flavor is the same, and a broken cake still tastes like lava cake.
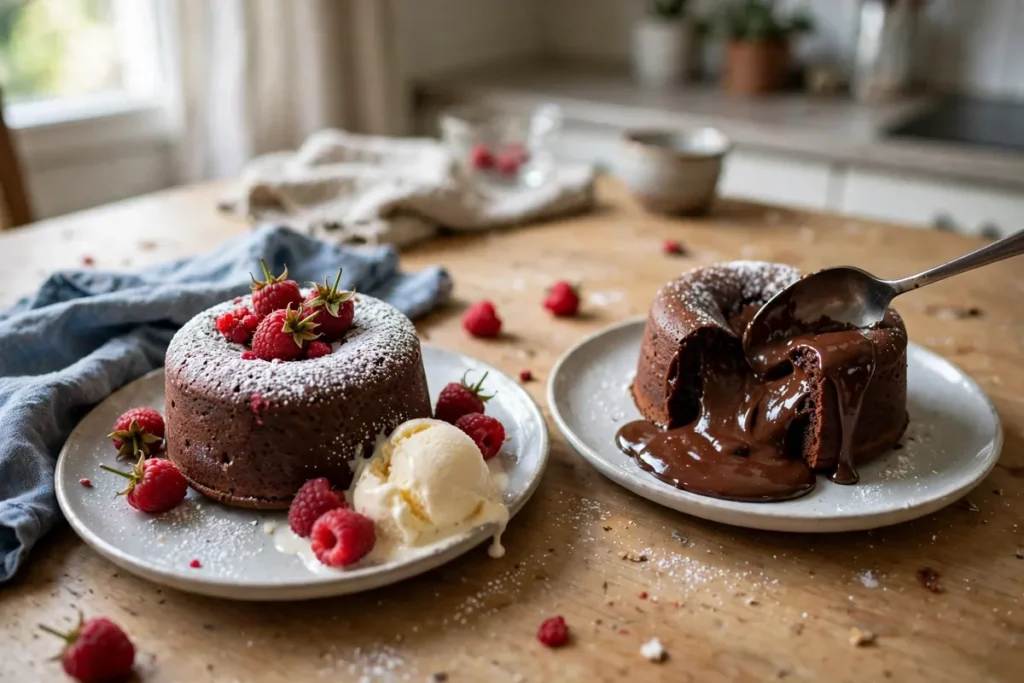
- Serve at Once: Dust with powdered sugar if you like, add a small scoop of vanilla ice cream or a spoonful of whipped cream, and serve right away. The center firms as the cake cools. After about 10 minutes on the plate, the flow slows and the cake eats more like a warm chocolate cake. That is still good, but it is no longer lava. Cut into the center with a spoon at the table so the molten chocolate runs out while it is hot.
Pro Tips for Perfect Lava Cakes
Grease every part of the ramekin, especially the bottom edge. Most stuck cakes stick at that bottom corner, not on the sides. Butter, then cocoa, then a second look for any bare spot will save the unmold.
Weigh the chocolate if you can. Three ounces is about 85 grams. Cup measures for chopped chocolate vary a lot by chunk size, and a heavy hand with chocolate firms the center.
Keep the melted chocolate warm, not hot, when it meets the eggs. Hot chocolate scrambles the egg on contact and leaves small cooked bits in the batter. Warm chocolate blends in smooth.
Watch the cake, not the clock alone. The chart gives you the window. Your eyes give you the verdict. Edges set and puffed plus a slight jiggle in the middle means done.
Do not open the oven door every minute. Each open door drops the temperature and stretches the bake. Check through the oven window first, and open only near the end of the range.
Use the same ramekins every time once you find your time. The chart covers common sizes, but your oven and your ramekins together set your exact minute. Note it on the recipe card after your first bake.
Variations
Peanut Butter Center: Drop 1 tablespoon of creamy peanut butter into the middle of each filled ramekin and push it just under the surface before baking. Bake to the same chart time. The peanut butter warms into a soft pocket inside the molten chocolate. Crunchy peanut butter works too, but the bits can catch on the knife during unmolding.
Salted Caramel Center: Spoon 1 tablespoon of thick caramel sauce into the middle of each ramekin the same way. The caramel thins in the heat and mixes with the chocolate center. Use a thick sauce, not a thin ice cream topping, so it stays in a pocket instead of sinking to the bottom.
Espresso Lava Cakes: Add half a teaspoon of instant espresso powder to the melted chocolate and butter. Espresso does not make the cake taste like coffee at this amount. It deepens the chocolate flavor and makes the center taste more chocolatey. Skip this version if you are serving children late in the evening.
Raspberry Lava Cakes: Press 3 or 4 fresh raspberries into the batter in each ramekin before baking. The berries soften and give a tart bite against the rich center. Frozen raspberries work, but add 1 minute to the bake time because they chill the batter.
White Chocolate Lava Cakes: Swap the semisweet chocolate for a white chocolate bar and keep the rest of the recipe the same. White chocolate is sweeter and softer, so bake at the short end of your ramekin range and check early. The center will be pale gold and very sweet, so serve it with tart berries to balance it.
Ingredient Substitutions
No chocolate bar in the pantry? Use semisweet chocolate chips and measure by weight, 85 grams, so the amount stays right. Expect a slightly thicker center because chips hold their shape makers add stabilizers. Melt them the same way, in short bursts with stirring.
No ramekins? Use oven-safe mugs or small oven-safe bowls with straight sides. Mugs vary more in size than ramekins, so use the chart time for the closest volume and check early. Avoid cups with a narrow base and wide top, because they bake unevenly and unmold poorly.
No butter for greasing? Use a neutral baking spray, then dust with cocoa the same way. Grease well either way. A light spray coat is a common cause of stuck cakes.
No vanilla? Leave it out. The cake still tastes like chocolate. Vanilla adds background warmth, but it is not structural. Do not replace it with almond extract at the same amount, because almond extract is much stronger and will take over.
Dairy-free version? Use a dairy-free dark chocolate bar and a plant-based butter that melts cleanly. The method stays the same. The crumb will be a little softer, so rest the full minute and unmold with care.
Dietary Notes
This recipe contains wheat, egg, and milk. It is not gluten-free as written. A one to one gluten-free flour blend can replace the all-purpose flour at the same 2 tablespoon amount, and the method stays the same. The crumb may be slightly more tender, so handle the unmold gently.
It is not dairy-free as written, but the dairy-free swap in the substitutions section works well. Check your chocolate label for milk if you are cooking for someone with a milk allergy, because some dark chocolate bars list milk as an ingredient.
For nut allergies, keep the peanut butter variation out and check the chocolate label for nut warnings. Most plain semisweet bars are fine, but labels vary by brand.
Make-Ahead, Storage, and Reheating
Make ahead is where this recipe earns its keep for dinner parties. Make the batter, fill the prepared ramekins, cover each one tightly with plastic wrap, and refrigerate for up to 24 hours. Bake straight from the fridge and add 2 to 3 minutes to your chart time. The cakes need that extra time because cold batter heats slower in the middle.
For longer planning, freeze the filled ramekins. Cover tightly with plastic wrap, then foil, and freeze for up to 1 month. Bake straight from the freezer, with no thawing, and add 4 to 6 minutes to your chart time. Frozen batter bakes unevenly if you thaw it halfway, so keep it frozen until it goes in the oven.
Baked cakes do not keep their lava. You can refrigerate a baked cake for up to 1 day, but reheating will set the center. Reheat in a 350 degree oven for about 8 minutes if you want a warm chocolate cake. Do not expect the center to flow again after a full reheat. For that reason, bake fresh whenever the molten center matters.
Leftover batter keeps in the fridge for 24 hours in a covered bowl. Stir it once before filling ramekins, because the chocolate can settle slightly on standing.
What to Serve With Chocolate Lava Cakes
A small scoop of vanilla ice cream is the classic partner, because cold cream against warm chocolate makes each bite richer without adding work. Whipped cream does the same job with less sweetness. Fresh raspberries or sliced strawberries cut through the richness and add color to the plate.
For a full dessert table, pair these cakes with our KFC-style crispy fried chicken earlier in the day if you are planning a dinner menu, and finish with the lava cakes as the warm dessert. For a lighter sweet spread, serve them beside our mummy hot dogs at a party, where the cakes give adults a warm dessert while the hot dogs cover the savory side. Our pumpkin cheese ball also works as an appetizer before a dinner that ends with these cakes.
Keep the plate simple. One cake, one scoop or one spoonful of cream, and a few berries is enough. A busy plate distracts from the moment the spoon breaks the center.
Recipe Notes
- Ramekin size sets the bake time. Use the chart in step 6 and check one minute early.
- The center is meant to stay soft. That soft center is the recipe working, not a sign of underbaking.
- Rest only 1 minute before unmolding. A longer rest keeps cooking the center in the hot ramekin.
- If a cake sticks, serve it in the ramekin. The taste is unchanged, and a second flip attempt often breaks the cake.
- Bake from the fridge with 2 to 3 extra minutes, and from the freezer with 4 to 6 extra minutes. Do not thaw frozen batter halfway.
- Use fresh eggs and read the food safety note in the card before serving to guests who should avoid soft-cooked eggs.
Chocolate Lava Cakes for Two – Molten Centers, Date-Night Perfect
Description
Two warm individual chocolate cakes with firm edges and liquid molten centers, baked in ramekins and ready in 27 minutes. Includes a ramekin-size bake chart, plus fridge and freezer make-ahead times.
Ingredients
Instructions
-
Heat the Oven and Prep the Ramekins
Heat the oven to 425 degrees Fahrenheit (220 degrees Celsius). Set two 6 ounce ramekins on a small rimmed baking sheet. Grease the insides well with soft butter, dust with cocoa powder to coat fully, and tap out the excess. -
Melt the Chocolate and Butter
Melt the chopped chocolate and 4 tablespoons butter in a heatproof bowl in 20 second microwave bursts, stirring between bursts, until smooth and glossy. Let cool for 2 minutes. -
Whisk the Egg, Yolk, and Sugar
Whisk the egg, egg yolk, sugar, salt, and vanilla in a medium bowl for about 1 minute, until pale, slightly thick, and uniform in color. -
Combine the Batter
Pour the warm chocolate mixture into the egg mixture in a slow stream, whisking as you pour. Stir in the flour with a spatula until just combined, with no dry streaks. -
Fill the Ramekins
Divide the batter evenly between the prepared ramekins, filling each about three quarters full. Tap each ramekin gently on the counter once. -
Bake Until the Edges Set
Bake on the middle rack at 425 degrees Fahrenheit until the edges are set and puffed and the center still jiggles slightly. For 6 ounce ramekins, bake 12 to 13 minutes. For 5 ounce ramekins, bake 10 to 11 minutes. For 8 ounce tall ramekins, bake 14 to 16 minutes. Add 2 to 3 minutes for fridge-cold batter, or 4 to 6 minutes for frozen batter. -
Rest, Loosen, and Unmold
Rest for exactly 1 minute. Run a thin knife around the inside edge of each ramekin. Place a dessert plate upside down over each ramekin, flip with oven mitts, wait 10 seconds, and lift the ramekin straight up. -
Serve at Once
Dust with powdered sugar if you like, add ice cream or whipped cream and berries, and serve right away while the center is still molten.
Nutrition Facts
Servings 2
- Amount Per Serving
- Calories 575kcal
- % Daily Value *
- Total Fat 46g71%
- Saturated Fat 27g135%
- Sodium 115mg5%
- Total Carbohydrate 41g14%
- Dietary Fiber 4g16%
- Sugars 30g
- Protein 8g16%
* Percent Daily Values are based on a 2,000 calorie diet. Your daily value may be higher or lower depending on your calorie needs.
Note
The center stays soft by design. Use fresh eggs. Take extra care if serving to pregnant, elderly, very young, or immunocompromised guests, because the center does not reach a fully set temperature. Handle hot ramekins with oven mitts at every step. The ramekins stay hot well after they leave the oven. Rest only 1 minute before unmolding. A longer rest cooks the center further in the hot ramekin. If a cake sticks, serve it in the ramekin rather than breaking it with repeated flips. Cooking method: Baked. Difficulty: Easy. Cooking temperature: 425 degrees Fahrenheit (220 degrees Celsius). Estimated cost: About 3 dollars total, about 1.50 dollars per cake, based on typical grocery prices for a chocolate bar, butter, and eggs. Pantry items like flour, sugar, salt, and vanilla add only a small amount. Best season: Winter, and year round for date nights and small celebrations. These are honest estimates calculated from the listed ingredients for this recipe only. Values vary with the chocolate brand and exact butter and egg sizes, so treat them as estimates, not exact lab values.